Subscribe:

Enter your email address:

Delivered by FeedBurner

Previous Posts

Categories

Site search


CHEESE BISCUITS SAY HAPPY HOLS AND MORE

I would rather labor over cassoulet for 12 than bake Christmas cookies. The very idea makes me want to run screaming out into the street. Don’t get me wrong: I greatly admire the people who carry on this tradition, willingly or under duress. I’m just not one of them.

Cheese biscuits, however, are a different story. I’m using the word biscuits here in the British sense to mean crisp wafers, and it’s still common parlance in colonial cities such as Savannah, where so many Anglo traditions—culinary and otherwise—took hold and thrived.

You’ll see a recipe for these cayenne-spiced nibblies (often in the form of cheese straws) in every community and Junior League cookbook published south of the Mason-Dixon Line. They’re standard fare at drinks parties, wedding receptions, and almost every other social occasion you can think of.

I’m very fond of how my mother served them, with soups and stews. Perhaps this was because the store-bought bread available at the time wasn’t particularly flavorful (a baguette, for instance, was unattainable), or perhaps she wanted a change from baking-powder biscuits or cornbread, I don’t know. But cheese biscuits are a great way to add a little savory richness, some finesse, to a meal. One—just one, mind—is also a civilized way to end an evening, along with a nightcap, or what some of us call a baby-doll.

I really like giving cheese biscuits as holiday presents. Even though it’s possible to buy every imaginable delicacy online these days, I think people are especially thrilled to open a gift that is homemade and almost profound in its plainness. And that is not something sweet.

Down South, people appreciate cheese biscuits because they know one can never have too many. Up North, there is an element of surprise, and, once tasted, delight. “Where have these been all my life?” the recipients exclaim, reaching into the box for another. And cheese biscuits have legs, real staying power. Not only are they good keepers, but you don’t get sick to death of looking at them, the way you do Christmas cookies. Face it: By January 1, those cookies are, literally, so last year.

Cheese biscuits are so simple to make that anyone, even a person who suffers from an extreme case of F.O.F (Fear of Flour), can throw them together without thinking about it. Buy the sharpest cheddar you can find, and if you are in the mood, cut it with Parmigiano-Reggiano, “for sass,” as Damon Lee Fowler explains in The Savannah Cookbook.

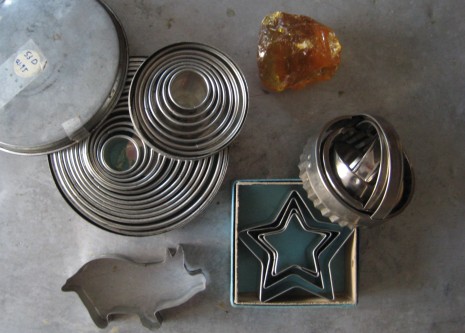
In the photograph above, you will see two slightly different cheese biscuits. At right are the fairly sturdy ones I make most often. They stay fresh in an airtight tin for days and even improve in flavor. I usually shape the malleable dough into logs and lop off rounds, just like icebox cookies. The ones you see contain chopped pecans and a dash of Worcestershire sauce, a la Craig Claiborne. At left in the photo are thinner, smaller, more delicate wafers that will do you proud at a fancy party. For those, I rolled out the dough like a pie crust and used a couple of cutters from my husband’s stash.

A very small part of his collection is on view below, along with a nice-sized chunk of frankincense. It gleams just like my go-to finishing touch for both biscuits—finely chopped crystallized ginger.

Cheese Biscuits

If the butter is softened and the cheese is at room temperature, this dough comes together in no time flat.

8 ounces extra-sharp Cheddar or 6 ounces Cheddar plus 2 ounces Parmigiano-Reggiano, coarsely grated (about 3 cups total) and at room temperature

1 stick unsalted butter, cut into pieces and softened

½ teaspoon coarse salt

A generous pinch cayenne pepper

A dash Worcestershire sauce (optional)

¾ cup finely chopped pecans (optional)

1¾ cups all-purpose flour, sifted

Crystallized ginger, finely chopped, for garnish

1. Beat together the cheese and butter until fluffy, then beat in the salt and cayenne. Beat in the Worcestershire and pecans, if using. Then gradually add the flour, beating well to incorporate. The dough should be very malleable, like Play-Doh.

2. Roll the dough into 2 (9-inch) logs for slicing. If you yearn to complicate things the slightest bit, then form the dough into 2 disks for rolling. Either way, wrap in wax paper and chill until firm but not hard, about 30 minutes. (Dough keeps in the refrigerator 1 week. You can also freeze it, wrapped well; let it thaw at room temperature until pliable enough to work with.)

3. When needed, preheat oven to 350° and cut each log into 1/8-inch rounds, giving the log a quarter turn after each slice so it stays round. (If your rounds are a little thicker than 1/8 inch, no big deal; the biscuits will look more rustic, take longer to bake, and, obviously, you will get fewer of them.)  If you have 2 dough disks, then, working with 1 at a time, roll out on a lightly floured surface with a lightly floured pin until 1/8 inch thick, about the same thickness as a pie crust. Then use your favorite biscuit or cookie cutters to cut out shapes. Gather the scraps and reroll.

4. Before baking, put a dab of crystallized ginger on top of each biscuit, pressing gently so it adheres.

5. You can either bake the biscuits, 1 baking sheet at a time, in the middle of the oven, or set the racks in the upper and lower thirds, and switch the baking sheets halfway through. Depending on the size and thickness of your biscuits, they’ll take anywhere from 16 to 18 minutes to bake. They are done when the bottoms are golden but the tops and sides are still pale.

PEARS: SHOPPING, COOKING, & EATING GUIDE

Pears are full of intrigue. Because they are usually rock-hard when you buy them, it’s difficult to gauge when they’ll be ready to eat and whether they’ll ultimately reward you with sweet, meltingly tender flesh. It’s no wonder that many shoppers pass them over for apples, which are immediately gratifying.

But some things, as we well know, are worth waiting for, and a ripe pear is one of them. This fruit is very efficient at ripening—or decaying, depending on how you look at it*. That’s why it needs to be harvested when mature but unripe. After resting in cold storage for a period of time, depending on the variety, it must finish ripening at room temperature. Personally, I never mind admiring their gorgeousness for the better part of a week. The anticipation is part of their ancient allure.

Figuring out when pears hit their prime can be tricky. Most varieties don’t signal their ripeness by changing color, but by yielding to gentle pressure around the neck, or stem end. I learned a great deal about pears from David Karp, a renowned fruit authority and former contributing editor at Gourmet. Ripening happens from the inside out, he explained, handing me a slice of Comice. “If you wait until they’re soft all over, they’ll be overripe—what the English call ‘sleepy.’ ” Once your pears are ripe, you can keep them in the fridge, but no longer than a few days.

If you’re like me, sometimes you’ve bought pears that have never gotten soft, period. That’s because they were held in cold storage too long. “They die, and never soften,” said David, who recently wrote an ode to the celebrated Warren pear for the L.A. Times. Because the Warren is such a finicky producer, it takes a fruit god—er, grower—like Al Courchesne of Frog Hollow Farm to make it more available. I’m especially happy about this, because it makes holiday shopping a breeze.

A quick recipe note: The brilliant thing about pears is that they don’t have to be ripe when you cook with them, so it’s not necessary to plan a pear tart or crumble days in advance. If you have ripe pears on hand, though, why mess with perfection? Serve them on your prettiest plates with a small, sharp knife and fork**. Put a generous wedge of farmstead Stilton on the table, and you have dessert and a cheese course at the same, with absolutely no effort at all.

A quick note on Asian pears: Unlike European-type varieties, Asian pears ripen on the tree and can be eaten straightaway. Varieties such as Shinseiki and 20th Century are famed for their juiciness and crunch. Russeted varieties like Hosui and Shinko are as sweet as candy. In Asia, pears aren’t cooked, but peeled and eaten fresh. Asian pears are sometimes called sand pears for their granular texture, due to a high concentration of thick-walled stone cells (sclereids).


Pears for Eating Out of Hand Bartlett, Bosc, Comice, Seckel, Warren, Asian pears; it’s customary to peel rough-skinned pears before eating.

Pears for Salads Asian pears, any firm-ripe European pears. Because pears begin to brown as soon as they’re sliced, toss them with some of the vinegar or lemon juice you’re using in the dressing.

Pears for Cooking Anjou comes into its own when baked in a pie or crumble; Comice bakes beautifully, too. Bosc and Seckel hold their elegant shape when poached in red or white wine, cider, or simple syrup.


Cheat Sheet to Pear Varieties***

Anjou (a.k.a. D’Anjou): First grown in France or Belgium in the 19th century, when it was known as Beurré d’Anjou, this plump, asymmetrical yellow-green pear is ubiquitous. Although it stores well and has tender, fine-textured flesh (it has a minimum of stone cells), its flavor is bland and not especially sweet.

Bartlett (a.k.a. Williams or Williams’ Bon Chrétien): You won’t find this variety in farmers markets now—it’s a summer pear and a poor keeper—but as it’s the most commonly grown pear in the United States and indeed the world, I thought it made sense to include it here. Golden and voluptuous, it has an enticing, musky aroma and flavor, as well as very juicy flesh.

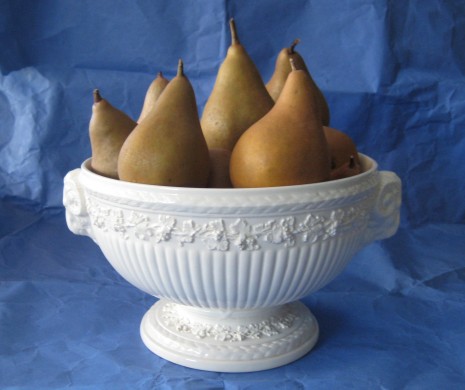
Bosc: Developed in Belgium in 1807 as the Beurré Bosc, this russeted pear (see above photo) is as versatile in the kitchen as it is beautiful. Aromatic, rich-tasting, and syrupy, its dense, firm flesh melts in the mouth when ripe.

Comice (a.k.a. Doyenné du Comice): If you’ve ever received a Christmas box of exquisite pears with the trademarked name of Royal Riviera, you’re familiar with Comice. With smooth flesh and an almost winey flavor, this is one of the world’s great dessert pears.

Forelle: This small, very old variety isn’t ultrasweet, but I don’t care. I just discovered with deep delight that the word forelle means “trout” in German. That must be why the sight of this pear, splashed with red freckles that gradually spread into a vivid red blush, puts me in mind of the Victorian poet Gerard Manley Hopkins.

Highland: This lightly russeted yellow Bartlett-Comice cross, from Cornell’s New York State Agricultural Experiment Station, was introduced in 1974. A good keeper, it has juicy, slightly granular flesh and balanced flavor.

Potomac: Released by the USDA in 1993, this Anjou cross is small, light green, and glossy. A good keeper, it resembles its parent Anjou in flavor.

Red Pears: Most red pears are “sports,” or natural mutations of varieties such as Bartlett and Comice, grown primarily for their beauty. Flavor- and texture-wise, they generally resemble their green or yellow counterparts.

Seckel (a.k.a. Honey Pear, Sugar Pear): Discovered near Philadelphia in the late 1700s, this very small, fine-textured variety has great charm. Although it postdates Albrecht Dürer by more than 250 years, both the pear and the painting below share a complex, abiding sweetness.

Albrecht Dürer, “Madonna and Child with Pear” (1526) Uffizi Gallery, Florence

* A conversation with culinary historian and former Gourmet contributing editor Anne Mendelson about the relative buoyancy of apples and pears (whoever heard of bobbing for pears?) led her to this little gem of a blogpost on rotting.

** You can find very nice sets of fruit knives and forks, some with mother-of-pearl or bone handles online. Throw in a box of Warren pears from Frog Hollow, and you have One Fabulous Present.

*** Among the purveyors at the Union Square Greenmarket, Terhune Orchards has marvelous pears this year. Earlier in the season, Samascott Orchards had the popular NY10346, bred at Cornell but never named; they’ve sold out for the season, but still have supplies of Bosc and Potomac. For market-day information, click here. Handsome color plates (technically, colorized photographs) of many of the varieties mentioned can be found in the peerless Pears of New York, by U.P. Hedrick and published by the New York Agricultural Experiment Station in 1921.


APPLES: SHOPPING, COOKING, & EATING GUIDE

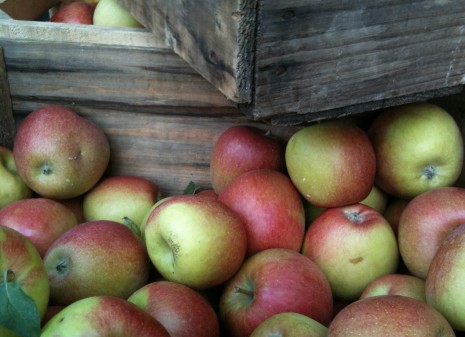
A visit to any farmers market this time of year will tell you that there are more apple varieties to choose from than ever before. You’ll find crates of rough-skinned heirloom russets plunked down next to more conventionally handsome Gala, Fuji, and Honeycrisp. Which are best for eating out of hand? For baking or applesauce?

All is revealed below, along with brief (i.e., far-from-comprehensive) descriptions of the apples I’m seeing around town this year. Bear in mind that, depending on the grower and his or her location, any variety can have an off-year due to weather, be picked too early (and thus be starchy or lack flavor development), or, later in the winter, be poorly handled once out of cold storage. Storage, by the way, isn’t a bad thing; some varieties are traditionally stored for a time to allow starch to convert to sugar or to mellow acidity. Sample apples from different growers and buy what tastes good to you. And because some varieties are more thin-skinned (and more easily bruised) than others, be gentle when selecting what you want as a courtesy to the seller and fellow customers. At home, keep apples in the refrigerator to delay ripening; if left out at room temperature, they’ll overripen and turn mealy. Larger apples ripen faster than small ones do.

A quick recipe note: When fried—that is, simply sliced and sautéed in butter—apples are a component of many a scratch supper in this household. I get them working in a small skillet on a back burner just as I’m pulling everything else together. By the time they’re browned and a little crisp on the outside, they’re creamy inside. They make a fabulous side to pork chops, ham, sausages, or roast chicken.

Crisp, Flavorful Apples for Eating Out of Hand Ashmead’s Kernel, Braeburn, Calville Blanc D’Hiver, Empire, Fuji, Honeycrisp, Jonagold, Macoun, Northern Spy, Winesap

Apples That Resist Browning (for Salads) Calville Blanc, Cortland, Granny Smith

Firm Apples for Pies and Fry-Ups Cortland, Granny Smith, Jonagold, Ida Red, Northern Spy

Apples for Baking Whole Cortland, Fuji, Jonathan, Ida Red, Mutsu, Rome, Winesap

Apples for Sauce Braeburn, Gala, Ida Red, Jonathan, Macoun, McIntosh, Mutsu, Winesap; mix two or three varieties for complexity of flavor


Cheat Sheet to Apple Varieties*

Ashmead’s Kernel: A classic example of the russet type, this 300-year-old variety is distinguished by its bronzed skin, rich sweetness, and juiciness.

Braeburn: A 1952 New Zealand apple with an intoxicating cidery aroma and great sweet-tart balance.

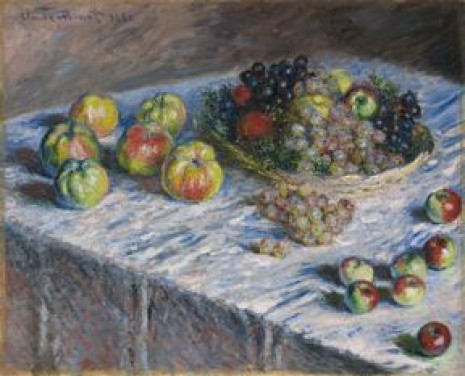
Calville Blanc D’Hiver: Cultivated in France since the 16th century, this great dessert apple of the world has tender, spicy flesh (the flavor improves in storage). Also notable for its ribbed appearance (well, at least Claude Monet thought so; see photo below) and the fact that it contains more vitamin C than an orange.

Cortland: This New York State McIntosh cross, introduced in 1898, is crisp, juicy, and more tart than sweet.

Empire: The year 1966 gave us the first episode of Star Trek, the Ford Mustang Fastback, and this sweet, slurpy, satisfyingly crunchy Red Delicious–McIntosh cross from New York State.

Fuji: Although the Fuji wasn’t introduced from Japan into the U.S. until the 1980s, its distinguished American pedigree includes the Ralls Janet (named in 1793 by Thomas Jefferson). Great flavor and texture; excellent keeper.

Gala: David O. Selznick would have loved this New Zealand apple for its Technicolor yellow skin dusted with red. Small, crisp, mild, and a good keeper, it’s ideal for lunch boxes and brown bags.

Golden Delicious: This West Virginia apple (dating from around 1914 and unrelated to Red Delicious) is aromatic and sweet. When shopping, look for apples pale yellow in color. If chartreuse, the fruit has been harvested too early; if deep yellow, you can bet the flesh will be overripe. Not a good keeper.

Golden Russet: If you find cider made from this mid-19th-century New York cultivar, pounce.

Granny Smith: An Australian apple dating from 1868, the Granny Smith is a fine, if not especially complex, tart (not sour) cooking apple. Although it remains green when ripe, paler specimens usually have more sweetness than those that are bright-green.

Honeycrisp: Released in 1991, this wildly popular Macoun cross from Minnesota has a wonderful snap and a mellow, honeyed flavor.

Ida Red: This tart 1942 Jonathan cross from Idaho adds character to pies, but it’s never been known as an eating apple. Perhaps the thick skin, which is a femme-fatale deep red, is a bit of a turn-off. Unpeeled Idas cook down into a pretty applesauce or apple butter, though; just strain the peels out at the end.

Jonagold: The fact that this 1968 Jonathan cross from New York is a bigger seller in Europe than it is at home is a mystery. Juicy, crunchy, and flavorful, it’s a terrific all-around eating and cooking apple.

Jonathan: This New York apple, which dates from around 1826, has a complex flavor, but it doesn’t keep well. Buy it when you see it and don’t let it linger too long in the fridge.

Macoun: A 1923 New York variety (pronounced ma-KOON**) that’s juicy and aromatic, with richer flavor than its parent McIntosh.

McIntosh: From Ontario (1798), this apple is a proud parent of Cortland, Empire, and Macoun. Its flesh breaks down quickly, which is why it’s so handy for applesauce. Because it’s not a good keeper, enjoy it while you can.

Mutsu (often labeled Crispin): This crisp, delicately spicy cultivar (pronounced moot-tsoo) is a Golden Delicious cross developed in Japan and introduced to the U.S. in the late 1940s. When shopping, look for specimens with a decidedly yellow background color. A greenish undertone is a sign of a too-early harvest, and you won’t get the best flavor.

Newtown Pippin: Tart and richly flavored, this Long Island cultivar, from the 1700s, is one of the world’s great keeping apples; its flavor gets fuller and sweeter after being stored. Compared with Granny Smith in a tasting, you’ll discover that the Newtown has more complexity. Unlike Granny Smith, though, it browns soon after being sliced.

Northern Spy: If you grew up in the East, this is the apple your grandmother used for pies. Originating in New York around 1800, it’s sweet-tart, juicy, and high in vitamin C.

Red Delicious: Bred for its beauty-pageant appearance and ability to endure long-distance shipping, this is the bestselling apple in the U.S. and a testament to—oh, don’t get me started. At its best, it’s on the tart side, but more often it’s insipid beyond belief; cooked, it disintegrates to mush.

Rome (or Rome Beauty): Named for Rome Township, Ohio, where the first large, thick-skinned fruit appeared back in the 1820s, this is the quintessential apple for baking whole.

Winesap: An all-around great kitchen apple, with a potent winey, spicy fragrance and flavor. First cultivated in New Jersey, it was important to the cidermaking industry by 1817. Today, it’s often eclipsed (and confused with) its sweeter offspring Stayman Winesap.

Claude Monet, "Apples and Grapes" (1880) courtesy Art Institute of Chicago

*Among the purveyors at the Union Square Greenmarket, Terhune Orchards (Salt Point, New York) is always reliable and they treat their apples with great care. For a range of heirloom varieties, try Samascott Orchards (from Kinderhook, New York). For market-day information, click here.

** The tomato-tomahto folks pale in comparison to the eminent authorities who disagree about the pronunciation of the word Macoun. The apple—developed at the New York State Agriculture Experiment Station in Geneva, New York, and named for the Canadian horticulturalist W.T. Macoun—may be called “mah-COW-an,” “mah-COWN,” or “mah-KOON.” The first pronunciation is correct as per Geneva, but the last is far more common. I’ve gotten so tired of being corrected, I’ve given up and added this to my list of Battles I Choose Not to Fight.

GRAVY RULES

A great pan gravy is not difficult to make, but attention must be paid, and at the last minute, too. That’s why so many examples of this noble subset of the sauce realm are truly god-awful. I know this for a fact, because I feel compelled to order gravy if I see it on a restaurant menu, no matter where I am.

I suppose I get what I deserve at a second-rate roadside diner (never set off in the car without emergency rations), but even at fancy restaurants, I’ve been dismayed. Gravy doesn’t need its dignified richness cut with irony. It doesn’t need a lift from precious or trendy ingredients, either. By and large, classic embellishments—shallots, onions, garlic, herbs, mushrooms, and/or various spirits and wines—do the job without unnecessary fuss or extravagance.

As my paternal grandmother, the family’s gravy genius, would say, “It’s all very simple, once you know how.”

Gravy Rule No. 1 I know it’s a bit late to be saying this, but make your turkey stock ahead of time and you’ll be sitting in the catbird seat. If you don’t get around to it until The Morning Of, however, all is not lost. Just take care not to rush the browning of whatever turkey parts you are using. Note that the key word is brown. Not golden, not golden brown, but brown. The more completely you brown the parts, the more flavorful and deeper in color the stock, and thus the finished gravy, will be.

Gravy Rule No. 2 The right roasting pan makes deglazing—adding liquid to dissolve the browned bits glued to the bottom—a piece of cake. Use a roasting pan that’s flameproof (not Pyrex or ceramic), obviously, and stable enough to fit securely across two burners. (Large, upright riveted handles, easily grasped with oven-mitted hands, are a plus.) Given your druthers, avoid nonstick. You want the meat juices to glom on to the pan, remember? That is how they turn into caramelized bullets of flavor. Furthermore, a dark nonstick finish can be irksome; it’s hard to see what you’re doing.

Gravy Rule No. 3 Have your stock mixture good and hot before making the roux—basically, flour cooked in fat (usually reserved from the pan drippings) until it loses its rawness. Once the starch granules in the flour are well-coated, they can’t form unfortunate lumps in a sauce—unless the liquid being introduced is not hot. Making a roux is quick business. Don’t dare look away, for it only takes a few minutes …. Just long enough to say,

Happy Thanksgiving!

Turkey Pan Gravy with Madeira

Adapted from Gourmet magazine (and my grandmother, the gravy genius)

Both my grandmother and my former colleagues at Gourmet gave gravy-making the respect it deserves, and so here I stand on the shoulders of giants. Although the addition of Madeira, a fortified wine like Sherry and Port, was certainly part of the magazine’s lexicon, I quite literally cut my teeth on the stuff. Dry white wine is a different, yet equally delicious, alternative.

about 8 cups turkey stock, such as Make-Ahead Brown Turkey Stock

roasting-pan juices from a 14-pound turkey (transfer the cooked bird to a carving board to rest, leaving juices in pan)

1 cup Sercial (medium-dry) Madeira

¾ cup all-purpose flour

salt and freshly ground black pepper

1. Bring the turkey stock to a gentle simmer in a medium pot. Skim the fat from the pan juices (or use a fat separator), reserving ½ cup fat.

2. Now, for the deglazing. Put the roasting pan across 2 burners, add the Madeira, and boil for 1 minute over medium-high heat, stirring and scraping up the browned bits with a wooden spoon. Add that lovely, fragrant deglazed liquid to the pot of stock and bring to a gentle simmer.

3. Once your stock mixture is ready, it’s time to make the roux. Look around for the reserved fat—it’s on the counter, somewhere—and put it in a cast-iron skillet or heavy (i.e., scorch-resistant) saucepan. Heat the fat over medium-low heat, then whisk in the flour and cook, stirring constantly, until the flour begins to take on faint color and no longer tastes raw, 3 minutes. Pour the hot stock mixture into the roux, whisking constantly, and simmer, whisking until thickened nicely. This should take about 10 minutes; you’ll be able to tell it’s ready by the sound it makes.

4. Whisk in any meat juices from the bird on the carving board, and taste. Season with salt and pepper if necessary, then ladle the gravy into a heated gravy boat or bowl.

Gluten-Free Option: I learned the trick of substituting cornstarch from the food editors at Gourmet, but I’ve used arrowroot or potato starch as well. The end result loses some overall richness (it’s lower in fat), but that is offset by a clean taste and lighter body.

Combine 1 cup room-temperature stock and ½ cup plus 1 tablespoon cornstarch in a bowl. Stir until the cornstarch is dissolved. Bring the pan juices and stock to a simmer in a heavy saucepan, and add the deglazing liquid. Give the cornstarch mixture one last stir, then pour it into the stock mixture, whisking. Bring to a boil, still whisking, and add any meat juices from the carving board. Boil 1 minute, then season and serve.

FAST-TRACK THANKSGIVING GRAVY: MAKE YOUR TURKEY STOCK NOW

Many people believe that the Thanksgiving bird is merely the means to an end: gravy. I don’t count myself among them—I enjoy the flavor of roast turkey, both white meat and dark—but there’s no arguing about the fact that you can never ever have too much rich, velvety gravy. It gives the entire meal a festive air.

That said, there is no reason to make more work for yourself on the big day. Instead, do as I do and make the stock—the underpinning of any fabulous gravy—ahead of time. It keeps in the refrigerator for a week, but I like to cross it off my list even sooner and freeze it. This genius idea is not mine, but that of my former colleague, Alexis Touchet, who was the senior food/travel editor at Gourmet. Alexis has always managed to combine unruffled calm with the razor-sharp strategic thinking of a field marshal; every single time I watched her in the kitchen, I learned something.

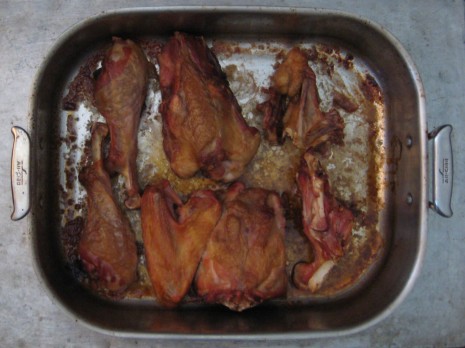
Premade stock comes in especially handy if you will be dealing with a frozen turkey. Who hasn’t scrabbled at a thawing bird, desperate to retrieve the packet of giblets? I’d rather head to the supermarket on my own timetable and pick up a few packages of turkey parts. The backs and drumsticks I picked up the other day were gorgeous, really meaty, and, averaging out to a dollar a pound, quite a bargain, especially when you consider that generously included with them were a few very fresh, clean-smelling bones. I only managed to score one turkey wing (63 cents), which always yields great body, but grab two if you have the chance.

Make-Ahead Brown Turkey Stock

Makes about 2½ quarts

To bring out the fresh, aromatic quality of the vegetables, I don’t roast them for a stock like this; the end result usually tastes too caramelized and sweet for me. If that roasty flavor speaks to you, though, go for it.

5 to 6 pounds fresh meaty turkey parts, such as backs, drumsticks, wings, and/or necks

1 large carrot, peeled, cut into 2-inch chunks

1 large celery stalk, leaves trimmed, cut into 2-inch chunks

1 large yellow onion, unpeeled, quartered

1 bay leaf

coarse salt

1. Preheat oven to 500ºF. Put the turkey parts in a flameproof roasting pan, fitting them in a single layer, and roast until deep golden brown, about 45 minutes. (Rotate the pan if necessary for even browning.) Before transferring the turkey parts to a large stockpot, cut large slits in the drumsticks to allow the flavor to more easily escape, and cut the wings in two at the joint, so they’ll stay submerged in the cooking liquid. If you included a neck in the pan, then it is perfectly okay to enjoy it now, all by yourself.

2. Place the roasting pan across 2 burners and add 2 cups water. Bring the water to a boil and use a wooden spoon to scrape up all that lovely browned goo that’s adhered to the bottom.* Add the liquid to the stockpot, along with 3½ quarts cold water, or just enough to cover the turkey parts by an inch or so; remember, you want to concentrate the flavor essence, not dilute it.

3. Bring to a brisk simmer over high heat and skim the foam. Add the vegetables, bay leaf, and salt, and return to a brisk simmer. Lower the heat so the liquid stays at a gentle simmer, and cook, partially covered, 3 hours. Don’t skim the fat on the surface; it will add flavor and body to the finished stock, and it’s easy enough to remove later, once it’s chilled and solidified.

4. In cooking school, I was taught that letting stock sit, unstrained, until it’s cool allows any off-flavors in the bones or overcooked vegetables to insinuate themselves into the liquid, so I strain the stock as soon as it’s done. Use a ladle to pour the hot stock through a fine-mesh sieve into a large bowl, discarding the vegetables and bay leaf along the way. (Eating the warm meat that falls off the bones is the cook’s perogative.)

4. Let the stock cool completely, then transfer it to airtight containers and refrigerate. It will keep in the fridge 1 week; leave on the protective layer of solidified fat until you’re ready to use it. If freezing the stock, chill it first, then remove the fat before putting it in the freezer. Reheat the stock before making gravy.

* For more about this step, called deglazing, as well as a photo of my tool of choice for the task, click here.

THANKSGIVING MUST-HAVE: NEW-CROP PECANS

The pecans above may look small and pale, almost drab. But I’d give anything if I could offer you some to taste. A plump, deeply grooved variety called Elliott, they are rich and buttery. Sweet. They have finesse. Most importantly, they are new-crop pecans—that is, just harvested—and their fresh, pure flavor is a world apart from that of most supermarket or big-box store pecans, which may well be last year’s crop released from cold storage*.

Unless you are from the Pecan Belt, which cuts a mighty swath from Georgia to Texas and New Mexico, it may not have occurred to you that pecans even have a season. Well, they do, and it’s now. The trees are alternate-bearing, meaning they bear a heavy crop load every other year. This is an “on” year, and, in Georgia, the top pecan-producing state in the country, up to 100 million pounds will be harvested this season, a very good yield.

What’s remarkable is that 2011 is projected to deliver the most valuable pecan crop ever for the state, with the nuts bringing $3 or more per pound for growers, a historic high. Aside from the record drought that’s significantly reduced the yield in states like Texas**, what’s pushing the price increase is demand from abroad, led by (oh, who do you think?) China. In that country, pecans, which contain more antioxidants than any other nut, are cannily marketed as a “long life” nut. Filling the vacuum left by a widespread walnut shortage, they’ve become a popular snack, and in the past five years, consumption has more than doubled.

When I was young, pecans were a popular snack in our household, too, although my parents wouldn’t have given two hoots about antioxidants. To them, pecans were the reason for an early-November weekend drive down a rural highway, looking for a familiar roadside stand. It backed up against a venerable family pecan grove, and the tall, centuries-old trees cast slatted shadows on the crushed-shell parking lot.

My father would ease the car to a stop and I would jump out, confident that we would be remembered from years past. Naturally, we were. After a hug hello, I would be directed to the bins of different cultivars. I was allowed to crack open and sample each, in order to help my mother choose. She invariably selected Elliott, my favorite variety to this day. My father would gallantly perform the heavy lifting, filling the trunk of the car with burlap sacks of unshelled nuts.

These days, I’m happy to get my pecans already shelled. I just received my supply of Elliotts from Ellis Bros. Pecans, a family farm (since 1944) in Vienna, Georgia, that also grows the larger, meatier Desirable and Stuart cultivars. I know I could have ordered online, but I picked up the phone instead, just to hear a familiar accent and have a neighborly conversation about pies and cornbread dressing. Naturally, I was remembered from last year.

Now, my mother made loads of pecan pies, but she was never a big fan. “They’re too sweet,” she would complain. They sure were: Her recipe, like that of every one of her friends, contained dark Karo syrup, and just typing those three little words makes my teeth ache.

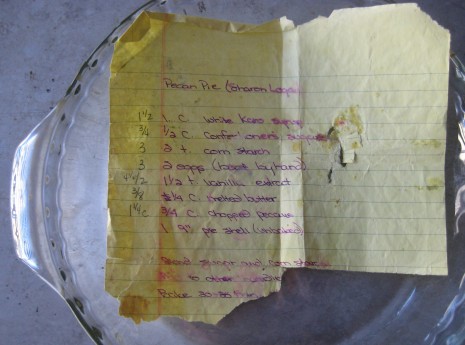
I never met a pecan pie I truly loved until I encountered that made by Sharon Logan, of Salem, Virginia. Throughout much of my life, she has been in my corner and in moments of crisis, my first thought is usually, “What would Sharon do?” She is also a wonderful cook, who, for years, put satisfying meals on the table every day for a family of six (and sometimes more). Sharon got this recipe from her great friend Page Chapman, and you will discover it is simple and delicious. Made with light Karo syrup, it is sweet but not too sweet. It will never fail you.

Thanksgiving Day Pecan Pie

Adapted from Sharon Logan and Page Chapman

Serves 8

For this pie, I use a favorite pastry dough recipe from my Gourmet days; it is quick and easy. In the below photo, the measurements at the left are calculations for a 9-inch deep-dish pie plate, if that’s what you have; many people like the taller, richer pie that results. I prefer using a 9-inch regular pie plate or tart pan because I think the shallower proportion of custard to pecans is just right, especially when you bump up the pecans to an even cup.

1 recipe homemade pastry dough (for a 9-inch pie or tart)

½ cup confectioners sugar

2 teaspoons cornstarch

1 cup light Karo syrup

2 large eggs, lightly beaten

1½ teaspoons pure vanilla extract

¼ cup unsalted butter, melted

1 cup roughly chopped pecans

whipped cream spiked with a little bourbon or rum (if desired), for serving

1. Preheat the oven to 375°F. Roll out the pastry dough into a 13-inch round on a lightly floured work surface. Fit it into a 9-inch pie plate. Trim the edge, leaving a ½-inch overhang, and crimp the edge; refrigerate.

2. Stir the confectioners sugar and the cornstarch together in a small bowl. In a large bowl, stir together the Karo syrup, eggs, vanilla, butter, and pecans. A wooden spoon is the best tool for the job.

3. Gradually stir the sugar mixture into the pecan mixture, taking care to mash any little clumps against the side of the bowl. Stir thoroughly to combine, then pour the filling into the pie shell. Bake 35 minutes or a bit longer, depending on your oven and your pie plate (Sharon and I both use Pyrex). When done, the crust should be golden and the filling, slightly wobbly in the center. Cool the pie on a wire rack and serve warm or at room temperature with whipped cream. If you are very lucky, there will be pie left over. It is especially delicious chilled, right out of the fridge.

*Unfortunately, there’s no telling how those have been handled: Because pecans have a fat content of more than 70 percent, they turn rancid quickly if left unrefrigerated (or languishing in the sun on a loading dock) for any length of time.

**Show those Texas growers some love and buy their pecans here.

LATE-SEASON TOMATO SAUCE

When I was a child, no one I knew cooked pasta (what we called noodles) with tomato sauce at home. In our part of the South, that sort of food was considered not just ethnic, but positively exotic, enjoyed as a special treat at the lone Italian restaurant in town. So although a college roommate introduced me to Ragú—we both thought it was pretty good—I didn’t have what you might call a relationship with tomato sauce until I moved to New York in the late 1970s.

By sheer good fortune, I had landed a job at Alfred A. Knopf, Inc., the legendary publishing house, and among the luminaries who graced the halls was Marcella Hazan. Knopf had recently come out with her More Classic Italian Cooking, and a few copies of her earlier (1973) book, The Classic Italian Cook Book, were floating around, too. (Both books are combined in Essentials of Classic Italian Cooking, published by Knopf almost 20 years later.)

Mrs. Hazan’s recipe for Tomato Sauce with Onion and Butter, from the first book, is at once devastatingly simple and life-changing. Aside from pasta and cheese, it lists just four ingredients—tomatoes (fresh or canned), one onion, five tablespoons of butter, and salt. That recipe has long been famous for being a gift to home cooks everywhere; periodically, it is rediscovered and wins a whole new fan base.

I made tomato sauce the Marcella way for years. Eventually, though, I branched out, impelled by curiosity and the fact that during peak tomato season, God will strike me dead if I let a single soft-ripe heirloom go to waste. That’s how I found out that, like stewed tomatoes, a sauce gets complexity and a good balance of acidity and fruity sweetness from a mixture of varieties, and those juicy heirlooms were more interesting to play with than the pulpier plum, or Roma, types available in New York.

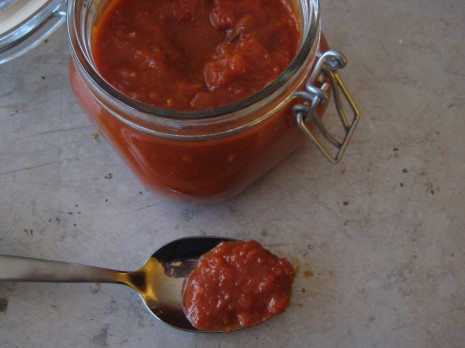
The basic sauce below is extremely versatile—it’s what my husband and I reach for when making pasta and pizza. It’s wonderful drizzled over flat fresh romano beans, a slab of meatloaf, or polenta. And it seems to taste even better when made with the last of the year’s tomatoes. I freeze as much of it as I can because the jar in the fridge will be gone in no time flat.

By the way, the key to a great tomato sauce is the right pot. You want something heavy-bottomed, to discourage scorching, and with a wide surface area, to aid evaporation. The less time the tomatoes spend reducing, the fresher and more immediate the flavor will be.

Notes on tomato prep: Some people like to peel and seed tomatoes before making sauce; others feel it’s more efficient to toss everything into the pot, then pass the cooked sauce through a food mill to get rid of the gnarly bits. I generally prefer doing the work on the front end, but I don’t blanch the tomatoes in boiling water first. Instead, I plunk them in a bowl, pour a kettle of boiling water over them and make myself a cup of tea while I’m at it. By the time I’ve gotten a sieve organized over another bowl, the tomatoes can be eased out of the hot water one by one; with a little help from a paring knife, the skins slip right off. To seed tomatoes, first cut them in half crosswise—around the equator—exposing the seed pockets. Use a finger to loosen the seeds in each pocket, then empty the tomato halves over the sieve.

To save every bit of the juices, I don’t chop the tomatoes on a cutting board, but instead in my hand, over the sieve. I dislike trips to the emergency room as much as the next person, so my tool of choice is a Dexter Russell oyster knife; the straight-edged blade is dull yet can still get the job done, the rubber handle is grippy in a wet hand, and the curved, rounded tip is ideal for flicking errant seeds out of the way. The chopped tomatoes go in the bowl underneath, and once you’ve pressed hard on the solids in the sieve, you can fling them into the compost pail knowing they’ve given their all.

Late-Season Tomato Sauce

Makes about 1½ quarts

I’ve never found my finished sauce to be overly acidic, so it never occurs to me to add any sugar, but I’m no purist: It all depends on the tomatoes. If your sauce tastes harsh, add a little brown sugar to taste.

1/4 cup extra-virgin olive oil

1 large yellow onion, chopped

3 fat cloves of garlic, minced

Several sprigs of fresh thyme, marjoram, or winter savory, tied together with kitchen string

5 to 6 pounds soft-ripe tomatoes, peeled, seeded, and roughly chopped

Coarse salt

1 or 2 fresh basil sprigs, if desired

a little unsalted butter, if desired

1. Heat the oil in a large, wide, heavy-bottomed pot over moderately high heat until it’s hot. Add the onion and cook until it begins to soften, then add the garlic. Cook, stirring occasionally, until the onion and garlic are thoroughly softened (don’t let them brown).

2. Add the tied herb sprigs, the tomatoes and their juices, and a generous pinch or two of salt. Simmer the sauce, uncovered, stirring occasionally, until it thickens nicely, about 1 hour. Taste the sauce and adjust the seasoning. Remove the herb sprigs.

3. Inspiration comes from many sources, and this is a trick I learned from Guiliano Bugialli, who taught me that basil isn’t used in a tomato sauce for its own flavor, but to bring out the flavor of the tomatoes themselves. After the sauce is done, add the basil sprigs if desired, simmer the sauce an additional 2 minutes, then remove the basil.

4. Stirring in a little butter at this point will round out the flavors in the sauce and give it finesse, but it’s by no means necessary. I like a fairly chunky sauce, but if you prefer something smoother, purée it in a blender. Let the sauce cool completely, before refrigerating or freezing.

MINESTRONE: A MARKET STORY

Most Saturdays, you’ll find me on the prowl for ingredients to turn into a dish with staying power, one that improves in flavor when made in advance and that will get us through part of a hectic week. In August, you might find an eggplant tian on our table (leftovers can be worked into pasta or provide the filling for a fabulous hero) and, in the winter, a pot roast or other braise is always a hit.

At the Union Square Greenmarket, my decision to make minestrone this week’s undertaking was sparked by the beautiful kale and cabbage from Northshire Farm, up in Herkimer County. There has already been frost upstate, and I knew the greens—basically, two variations of the same vegetable—would be the sweeter for it.

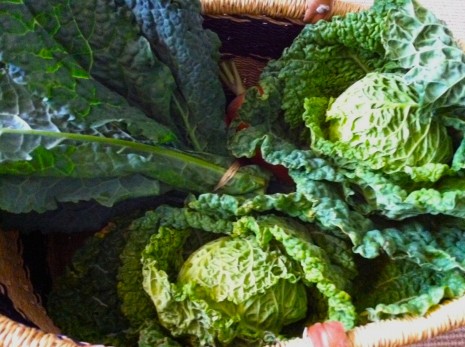
There are many versions of minestrone in the world, but as far as I’m concerned, if it doesn’t include kale, then it’s vegetable soup, not minestrone. I’m partial to the variety known as lacinato, which I always say has more aliases than a gangster on the lam. Whether a market purveyor or your local supermarket labels it Tuscan kale, black kale, cavolo nero (“black cabbage”), or dinosaur kale, it’s easily recognized by its crinkled leaves (above photo, at left) and the alluring, almost meaty, depth of flavor it brings to the pot.

In the mountainous Piedmont region of Italy, the narrow roads hairpin around backyard kitchen gardens filled with the plants, which grow a good two to three feet high and spread out luxuriantly, like palmettos. Their distinctive color—an inky green-blue-black—reminds me of the Atlantic Ocean, even in the foothills of the Alps. One of the darkest of the brassicas (which include broccoli, brussels sprouts, mustard greens, and collards), lacinato is packed with vitamins A, K, and C as well as calcium, protein, and loads of carotenoids; in fact, it’s one of the most nutritious (and delicious) vegetables on the planet. It’s also one of the easiest to prepare: In general, the stems and center ribs are tender enough to eat, so there’s no need to strip them out of the leaves beforehand.

Regular cabbage, with its tight head of smooth leaves, is perfectly fine in a minestrone, but given your druthers, choose a savoy type (above, at right) instead. Flaunting a characteristic loose hoop skirt of crinkled leaves, savoys have been immortalized by still-life painters and ceramicists for centuries, but they’ve long been renowned, too, for their hardiness and flavor. I was delighted by the manageable size of the ones above, and their sweetness is outstanding. I used one in the minestrone, and perhaps next week (cabbage keeps well in the fridge), I’ll shred the other and sauté it Indian-style, with cumin, chiles, and fresh ginger.

Beans play an integral role in minestrone—they contribute richness and body—but take care not to turn this into a bean soup. I always like to keep John Thorne’s rumination on minestrone (which you can find in his essay collection Mouth Wide Open) in mind. “Each aspect is rather delicate,” he observes, “and the main goal of the cook is to let all the parts shine through …. Because the soup is built around no special ingredient—beef, say, or chicken or meatballs or shrimp—no spoonful is to be treasured more than another.”

I also share John’s aversion to tossing a Parmigiano-Reggiano rind into the mix. “As anyone who has gnawed on one will know, the rind is nearly tasteless,” John writes, “and does nothing for the soup that a generous grating of the actual cheese can’t do better.” Reading that was liberating, and I stopped fishing a greasy, only slightly-less-hard remnant out of the finished soup (and feeling obliged to genuflect in the process) years ago.

One last thing: I’m not including a procedure for cooking the beans in the recipe below, so use whatever tried-and-true method works for you. What I often do is put a pound of dried beans to soak in the morning, then cook them up that night, while I’ve got supper working. The next day, I’ll use some in minestrone, and freeze the rest in small, easy-to-thaw amounts. They come in handy for all sorts of things.

Minestrone

Makes about 4 quarts

A quart or two of this soup in the freezer means that down the road, you can put a delicious and wholesome supper on the table without any effort at all. When reheating the thawed soup, simply add water to thin. I like to serve minestrone with garlic toast or large homemade croutons. I’m equally fond of how Lynne Rossetto Kasper’s grandfather enjoyed it, as described in The Italian Country Table: Lay a slice of toasted rustic bread in each soup bowl, moisten with olive oil, and ladle in the minestrone.

¼ cup olive oil

3 ounces thinly sliced pancetta or prosciutto, chopped

1 large yellow onion, chopped

2 large garlic cloves, chopped

1 large carrot, chopped

1 large celery stalk, chopped

¼ pound green beans, trimmed, cut into ½-inch lengths

2 medium zucchini, chopped

½ pound potatoes, peeled and cubed (submerge in cold water if prepping ahead)

1 bunch kale (preferably lacinato), stems and center ribs discarded only if tough, leaves sliced thin crosswise

1 small cabbage (preferably savoy), cored, halved, and shredded

1 large can whole tomatoes in juice, drained, roughly chopped

6 cups chicken broth (low-sodium if using store-bought)

1½ cups cooked white beans*

salt and freshly ground pepper

freshly grated Parmigiano-Reggiano or your best extra-virgin olive oil** for serving

1. First, make the aromatic base that gives the soup its underpinning. Heat the oil in a 7- to 8-quart heavy pot over medium heat. When it’s hot, add the pancetta, and cook it, stirring, until it’s pale golden and crisp, about 5 minutes. Add the onion and cook until it’s softened, about 5 minutes. Stir in the garlic, carrot, and celery and cook until they begin to soften and mellow, another 4 or 5 minutes.

2. Time to add the green beans, zucchini, and potatoes. Stir them into the pot and cook, stirring occasionally, for about 5 minutes. Add the kale and cabbage, stirring them into the vegetables. Cook for another 5 minutes or so, until the greens begin to wilt, then add the tomatoes and broth. Increase the heat to bring the soup to a boil, then cover the pot and reduce the heat, fiddling until you achieve an even simmer. Now, you can pretty much leave the soup alone for one hour.

3. In a blender, purée about half the white beans with 1 cup of their cooking liquid. (This detail sounds like a pain, but it takes less than a minute and gives finesse and body to the finished soup.) Add the purée and remaining whole white beans to the soup and simmer for another 15 or 20 minutes and season to taste with salt and pepper. Serve with a sprinkling of Parm or a drizzle of olive oil.

*Soaking and cooking dried beans from scratch is staggeringly simple, but I have terrible luck with cannellini beans—they never seem to get tender. That’s why I prefer borlotti (cranberry) beans, Great Northerns, or navy beans. If you want to use canned beans, drain and rinse them first. I wouldn’t use that thick residue left in the can for puréeing but would substitute water.

** Or both, if you’re the go-for-broke type who loves butter and sour cream on a baked potato.

SAGE ADVICE FOR OCTOBER

October is a swing month. The trees are reluctantly turning red and orange and yellow. Kitchen gardeners are sowing fast-growing radishes and lettuces while simultaneously harvesting pumpkins and cauliflower. Even when the weather is fine, there’s an edge to the air, a sharpness, when you take a deep breath.

October, with its fat-bellied letters, is also the roundest month, with full, mellow flavors. Right now, I can’t get enough sage, with its warm, almost musky, spiciness. Last spring, I bought every variety I could find because the plants were so beautiful, and they obliged by growing like gangbusters. I got hooked gradually, plucking pretty leaves of variegated golden sage to scatter over platters of fried green tomatoes. Then I started substituting a sprig of pineapple sage for the mint in tea, both iced and hot.

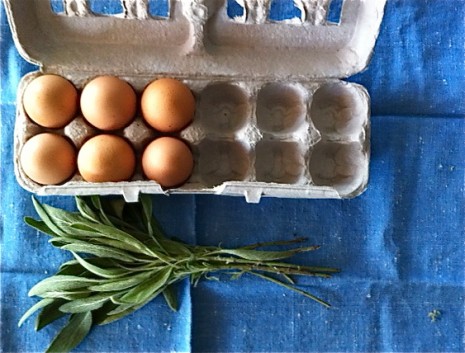
The common sage shown above has a great graphic quality. I’ve always thought it a pity that most recipes call for it chopped, especially when you have a ready supply of the young green leaves, which aren’t as pungent or furry as mature ones. They make a terrific substitution for parsley in parsley-leaf potatoes, a simple, effective party-trick recipe from Gourmet.

That decal-like quality comes in handy for other things as well. I was reminded of our friend Josh van Gelder, an English photographer with a fabulous blog called The Curious Eye. A few years back, he wrote about eating fried eggs with sage at Leila’s Shop, in Shoreditch. The idea was intriguing. Sage is a standard seasoning in sausage, but the notion of eating such a strong-flavored herb more or less intact first thing in the morning isn’t everyone’s cup of tea.

Of course, it isn’t precisely new, either. A look through Will Weaver’s annotated translation of Sauer’s Herbal Cures: America’s First Book of Botanic Healing revealed this tidbit of 18th-century advice: “Some people imagine themselves safe that by eating a few sage leaves with salt in the morning before breakfast, they will be protected the whole day from contagion and miasma.” Whatever it takes.

My déjà vu moment occurred the other day, when I took a carton of eggs out of the fridge and a bag of our fresh garden sage tumbled out with it. I didn’t even ask Sam what he wanted for breakfast, but just got busy putting it on the table.

Now, perfection in fried eggs is a matter of individual taste. People generally agree that a properly runny egg yolk should be in a state of suspended animation until you sink a fork into it, but I happen to like my yolk surrounded by a crisp, almost frizzled border of white; Sam prefers his with the white just set and very tender. Breakfast sandwiches, obviously, call for eggs over easy; I have two smallish wooden spatulas that are just the tools for the job. As far as steam-frying—that is, cooking them covered—goes, I’ve never quite gotten the hang of it. Although the resulting white is perfectly cooked through, I’m not crazy about the film of white that creeps over the yolk, and I never know what to do with the condensed steam that accumulates on the underside of the lid. Even though I uncover the eggs very quickly, I always get them wet.

But no matter how you like to fry your eggs, you’ll find this embellishment delicious, especially if you start with fresh, good-quality eggs.

Sage-Fried Eggs

This is also a terrific option for a quick, inexpensive, nourishing supper. Put the fried eggs on top of hot, buttery spaghetti. Cut the egg into manageable pieces and coat the strands of pasta with the yolk and fat from the skillet. Add some Parmigiano-Reggiano, if you like, or maybe garlicky croutons or toasted fresh breadcrumbs.

bacon drippings, butter, or olive oil for frying

1 or 2 large eggs per person

about 3 sage leaves per egg, rinsed and patted very dry

salt and pepper

Heat your fat of choice in a skillet over moderate heat. When the fat is good and hot but not smoking, ease the eggs into the pan. (I like to crack each egg into a custard cup first, but do it your way.) Immediately put a few sage leaves, top side down, into each liquid white. With your fingers, flip over the leaves so they integrate themselves into the whites as they firm up. It takes about 3 or 4 minutes to fry an egg until the white is nicely set, with a still-runny yolk. If you like your egg to crisp up around the edge, like I do, it takes a bit longer.

CELERY ROOT, THE FROG PRINCE

New York, October, 1978. The restaurant? Les Pleiades. Tucked in the Surrey Hotel, at 20 East 76th Street, it was one of the city’s classic French “red room” restaurants and a legendary gathering place for art dealers, collectors, auction-house experts, and museum directors. The first course on everyone’s plate? Céleri rémoulade, impeccably cut matchsticks of raw celery root (a.k.a. celeriac) tossed in a tangy mustard sauce.

I’d been invited out to dinner by Jim Williams, an antiques dealer and preservationist from Savannah, in town on business. This was a few years before his arrest and subsequent four trials for the murder of his assistant (the subject of John Berendt’s Midnight in the Garden of Good and Evil), and he was in great form, happy to acquaint me with one of the best salads in the world. On the plate, it was simple, almost stark. The first forkful changed my life. I’d never eaten celery root before, and the flavor was haunting, elusive. It was suave. The following summer, when I finally got to France, I discovered it was on the menu of almost every bistro. I practically lived on the stuff.

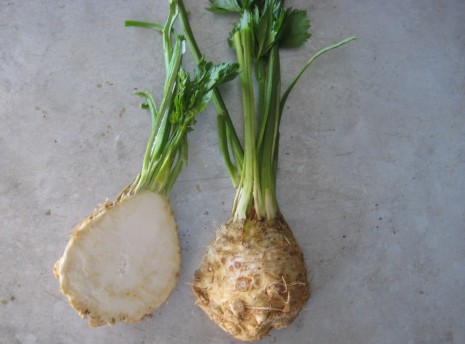
Celery root and regular bunch celery are different varieties of the same plant, but celery root has a milder, more complex flavor. Its mellow roundness never fails to swing me joyously into fall. In fact, I know it is fall when I see crates of celery root at the Union Square Greenmarket, for the crop takes a long time to reach maturity. Purveyor Keith Stewart, who fondly calls celery root “the frog prince of root vegetables,” sows seeds in his greenhouse in early March. “We transplant to the field in May,” he says, “and usually don’t harvest until September, October, and November.” The fact that Keith’s celery root is organic is a big plus as far as I’m concerned; I like knowing that anything that sits in the ground as long as celery root does is absorbing nothing but nutrients from the soil.

When eaten raw, as in rémoulade or simply sliced, alongside a sandwich, celery root’s fine-grained texture and herbal sweetness shine. When cooked, it doesn’t turn starchy like so many root vegetables, but instead becomes velvety, giving body and boost to creamy soups or purées. It’s fabulous braised with bacon and onions, as in Volume 1 of Julia Child’s Mastering the Art of French Cooking, or cut into pieces and tossed with nothing more than olive oil, salt, and pepper before roasting until tender and golden.

It’s hard to believe all that finesse comes from such a gnarly, impenetrable-looking vegetable—the sort that people pick up, wonderingly, in the supermarket produce aisle, then put down before wheeling their shopping buggies over to the potatoes. In truth, celery root is nothing to be afraid of, for it’s perfectly straightforward to prep. Give it a good scrubbing first, because it can be sandy. Whack off the top and bottom, then use a sharp paring knife (a peeler isn’t up to the job) to remove the thick, warty skin, working from top to bottom. The creamy white flesh of celery root oxidizes fairly quickly, so if you are dealing with several of them, plunk the peeled roots into a bowl of lemon water.

To cut celery root into matchsticks, you have three options: a food processor fitted with the julienne blade; a mandoline or Benriner-type slicer; or a sharp large knife. Unless I’m making céleri rémoulade for lots of people, I tend to use a knife; dragging the food processor out of its hidey-hole (our kitchen is the size of a postage stamp) seems like more trouble than it’s worth, and trimming the root to fit a mandoline can be fiddly work. If you opt for this low-tech method as well, here’s an efficient way to go about it: Cut a peeled whole celery root into thin slices (about an eighth of an inch thick) with a large knife. Then cut a stack of three or four slices lengthwise into strips of the same width.

The other day, I found myself rushing through the task. I’m not sure what made me stop and think of Les Pleiades, but picking up my knife again, I tried to make my matchsticks as flawless as possible.

Céleri Rémoulade

Adapted from The Gourmet Cookbook with an assist from Mastering the Art of French Cooking (Vol.1), by Julia Child

Serves 4

Céleri rémoulade makes a wonderful first course for ham, a pork roast, duck, you name it. It’s a great company dish, because you must prepare it in advance. If there are any dregs left in the salad bowl, save them for the morning. They are delicious (like almost anything) on hot toast.

For marinating the celery root

1½ pounds celery root, peeled and cut into matchsticks

About ½ teaspoon salt

2 tablespoons freshly squeezed lemon juice

For the sauce

1 tablespoon Dijon mustard

1½ teaspoons freshly squeezed lemon juice

1½ teaspoons white-wine vinegar

A pinch of sugar

Salt and freshly ground pepper

3 tablespoons extra-virgin olive oil (not an over-the-top peppery one) or vegetable oil

Minced mixed green herbs (or plain old flat-leaf parsley), for serving

1. Put the celery root, salt, and lemon juice in a bowl and toss well. Cover the bowl and marinate the celery root in the refrigerator for at least 30 minutes and up to 1 hour.

2. In another bowl, whisk together the mustard, lemon juice, vinegar, and sugar, with salt and pepper to taste. Whisk in the oil in a slow stream.

3. Drain the celery root and return it to the bowl. Dress it with the mustard sauce, tossing well to coat. Refrigerate the salad, covered, for at least 1 hour and up to 3 hours. Decorate with herbs (as Julia would say) just before serving.