Photograph courtesy of Rick Ellis
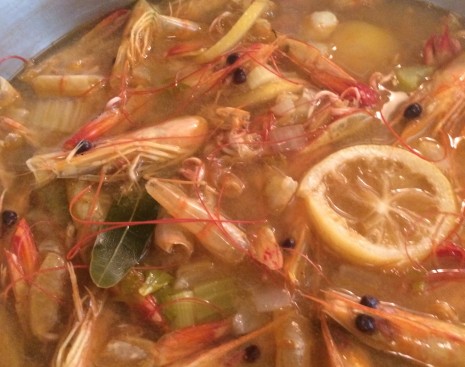
Shrimp Creole. You’ll find it taking pride of place in any number of New Orleans restaurants, and south Louisiana home kitchens, too, especially on Fridays during Lent. But I love it this time of year even more, I think—its rich fullness of flavor makes it a great swing season dish. And it would be nothing without homemade shrimp stock, which is what you see above.
“Making shrimp stock is a little endeavor-ish,” said our friend Rick Ellis, a food stylist and culinary historian. “But you can freeze the leftovers.” Considering that Rick makes one of the best shrimp Creoles on the planet, I’m willing to go the extra mile.
I found it helpful, of course, to have Rick’s recipe in situ, as it were. Along with his husband, the decorator and antiquarian Thomas Jayne, he divides his time between a SoHo loft in New York and in an 1830s brick townhouse in the French Quarter of New Orleans. Last week, their welcoming spread of satsuma Old Fashioneds, pickled okra, and browned hunks of chef Donald Link’s boudin kicked off a whirlwind architectural tour of a city that is not just a miracle of survival but an unrivaled urban landscape.
Tall, handsome “too much ain’t enough” houses with wrought-iron balconies fashioned by Canary Islanders … West Indies–style plantation houses, designed to keep cool air moving … blocks and blocks of Creole cottages, with their open doors and painted shutters fastened back from the windows … often-dilapidated corner stores, which serve an extended family of regulars … café-bars, with their rows of gleaming bottles and clutch of marble-topped tables …. Where else in the world would you find offerings so varied and various? “Some cultural connections are on the surface,” said Daphne Derven, curator of education at The Historic New Orleans Collection, my new favorite museum. “But others you have to look for.”
Take the most notorious stretch in the French Quarter, chockablock with moseying bead-bedecked tourists and on-the-make hucksters, and redolent with the smells of booze, cats, drains, and humid subtropical air. “Bourbon Street is the most interesting naughty street in the world,” observed Tulane preservationist John Stubbs. “Look up and you see those nineteenth-century cornices.”
Or you may see Rick, rushing home with a fat bundle of Gulf shrimp, tightly wrapped in damp newspaper. “These couldn’t be any fresher,” he said. “And they’re heads-on—that’s the only way they’re sold at the market.” From his extensive collection of early American cookbooks, Rick knows what today’s cooks are discovering for themselves: the wonderful goodness that resides in shrimp heads. “They’re the key to a great shrimp stock,” he added, cradling his parcel like a newborn.
There are as many versions of shrimp Creole as there are definitions of the term Creole. Far too many of them are stodgy, sludgy, and/or overly spiced, but when you find a good one, you rejoice in its individual character and nuances. To my mind, what sets Rick’s apart is how balanced it is. “I’ve made shrimp Creole for years, but I’ve never written down an actual recipe until now,” Rick admitted. One influence was a recipe he found at Nola Cuisine. “It made me realize that because a shrimp stock cooks in just forty-five minutes—more quickly than, say, a chicken stock—it makes a huge difference when you chop the onion and celery, instead of simply cutting them into big chunks. You need to get the flavor out of them fast.”
And finely chopping the vegetables for the finished dish changes things up, too. “My sauce was always flavorful, but chunkier, cruder,” Rick explained. “With a finer chop, it’s still vegetable-y, but more refined. And it clings better.” Velvety, I’d call it.
When it comes to technique, “browning the tomato paste results in an incredible deep tomato flavor,” he said. “I’d never done that before, and again, it makes a difference. Most importantly, though, it’s so important to season as you go—it’s all about the layering, like an Italian ragù. You’re layering seasonings, and you’re layering cooking techniques.”
Rick doesn’t use a commercial Creole spice blend, but instead prefers to add a teaspoon of this, a half teaspoon of that, and a quarter teaspoon of sumpin else. It sounds persnickety, and I was curious about the inclusion of both black and white pepper. I know it’s common in Creole recipes, and white pepper has a sweeter afternote, but in such small quantities, can’t you skip it and use more black pepper? “Well, sure,” Rick wrote in a follow-up email. “It could be substituted. But I am fond of Paul Prudhomme‘s use of the three peppers in his cooking. He thought it was a more rounded heat.” Got it.
Shrimp and pork have a great affinity for one another, but I also wondered about Rick’s inclusion of andouille, the famous Cajun smoked sausage. It’s not what you would call traditional. “I thought it would add a bit of depth,” he said. “And it also serves to stretch the recipe, so you can feed a crowd.” When practicality trumps purism, food evolves, just like architecture.
Shrimp Creole is indeed one great party dish, and tripling this recipe will serve 18 to 25 very lucky people. Freeze any leftover shrimp stock for gumbo.
Rick Ellis’s Shrimp Creole
Serves 6
It’s fair to say that shrimp Creole is labor intensive, but just add a loaf of French bread and a big green salad, and you are d-o-n-e, done. A little satsuma juice (or other mandarin orange juice) in the vinaigrette is a very nice touch.
For shrimp stock
2 pounds unpeeled large shrimp, with heads on if you can get them
½ cup chopped onion
¼ cup chopped celery
2 garlic cloves, peeled and smashed
1 lemon, cut crosswise into slices
2 bay leaves
1 teaspoon dried thyme
1 teaspoon whole black peppercorns
For shrimp Creole
2 tablespoons butter
1 tablespoon olive oil
1 large onion, finely chopped
2 ribs celery, finely chopped
1 small green bell pepper, cored, seeded, and finely chopped
coarse kosher salt, freshly ground black pepper, white pepper, and cayenne pepper
2 tablespoons tomato paste
3 tablespoons minced garlic
½ cup dry white wine
2½ cups diced tomatoes (fresh or canned)
2 cups shrimp stock (see above)
2 bay leaves
2 teaspoons dried thyme
1 tablespoon Tabasco
1 tablespoon Worcestershire Sauce
Reserved peeled, deveined shrimp from making stock
½ pound andouille sausage, diced
Accompaniment: cooked white rice
For garnish:
½ cup thinly sliced scallions (green onions, in local parlance)
2 tablespoons finely chopped parsley
To make shrimp stock:
1. Peel and devein the shrimp, reserving shells and heads. Refrigerate shrimp until ready to use.
2. Place shells and heads in a large pot and add the onion, celery, garlic, lemon, bay leaves, thyme, and peppercorns. Add enough water to cover and bring almost to a boil. Reduce heat to low and simmer 45 minutes.
3. Let mixture cool slightly, then pour through a sieve into a bowl, pressing on solids with the back of a spoon to extract as much liquid as possible. Reserve stock. (Any leftovers may be frozen for later use.)
To make shrimp Creole:
1. Melt the butter with the olive oil in a large pot over medium-high heat. Add the onion and cook, stirring occasionally, until golden brown. Add the celery and bell pepper, reduce the heat to medium, and season with 2 teaspoons salt, 1 teaspoon black pepper, 1 teaspoon white pepper, and ¼ teaspoon cayenne. Sauté the vegetables until softened, 12 to 15 minutes.
2. Add the tomato paste and garlic. Mix well and cook, stirring constantly, until the paste begins to brown. Add the wine, increase the heat to high, and cook until the mixture is almost dry.
3. Add the tomatoes and ½ teaspoon salt. Stir well, reduce the heat to medium, and cook 15 to 20 minutes. Add the shrimp stock, bay leaves, thyme, ½ teaspoon each black pepper and white pepper, and cayenne to taste. Bring to a boil, then reduce heat to low. Simmer 40 to 45 minutes.
4. Add the Tabasco and Worcestershire and season with salt. Bring the sauce to a boil, reduce the heat to low, and stir in the shrimp and andouille. Gently simmer until shrimp is just cooked through. (Be careful not to overcook the shrimp.)
5. Serve alongside a big spoonful of rice and garnished with the scallions and parsley, for brightness.