Subscribe:

Enter your email address:

Delivered by FeedBurner

Previous Posts

Categories

Site search


RECIPE FOR HAPPINESS: CREAMLESS CREAMY CORN WITH FRESH CHIVES

blog-sweet corn5

“People have tried and they have tried, but sex is not better than sweet corn.”  —Garrison Keillor

Sweet corn is one of America’s great icons of summer. Harvested when the ears are tightly jacketed in green leaves and the kernels are plump with milky-looking juice, it’s piled high at roadside farm stands, and odds are you’ll see skid marks on the pavement out front.

A number of connoisseurs in my neck of the woods flock to Country View, on the Main Road in Southold, New York (just past the North Fork Table & Inn). The place’s one-stop shopping appeals to anyone who just wants to get horizontal in a hammock or beach chair and not have to worry about supper. Plus, the corn is outstanding—sweet but not sugary, with tender, juicy well-formed kernels and pure corn flavor that comes through loud and clear.blog-sweet corn3

One of the things I like about Country View is that you have to know to ask for the corn. It’s not heaped out front as a calling card, but kept on a shelf near the cash register, away from gimlet-eyed customers who, ignoring any hand-scrawled signs to the contrary, strip the husks to inspect the ears, then toss the rejects back on the pile. That behavior results in ruined, unsellable corn: Once the kernels are exposed to the air, they begin to dry out (thus toughen) and lose nutrients to boot.

Removing the self-serve aspect may seem insidery and a little off-putting, but the good folks behind the counter are simply doing their best to prevent corn carnage—and more power to ’em, for I’ve never gotten a less-than-stellar ear. The fact that the corn isn’t genetically modified—and is labeled as such—is another reason I happily give them my food dollars.blog-sweet corn2

The way you can tell if plump, even kernels have filled out the whole cob, by the way, is to simply feel around the top of the ear through the husk. The shank (stem) end should look recently cut, the husks should be a vivid green and slightly moist, and the silk at the top should feel slightly tacky to the touch.

As to why some ears boast fat kernels from stem to stern and others don’t, it has to do with, well, what Garrison Keillor was talking about. The corn plant has both a male part (the tassel at the top of the plant) and a female part (the ear, which consists of cob, kernels that develop after pollination, and silks). Wind carries pollen from the tassel of one corn plant to the silks of another, and each of those silks is connected to a potential kernel of corn inside each ear. If pollen reaches a silk, it causes a corn kernel to grow; if a silk doesn’t receive pollen, its kernel remains small and undeveloped.

And that is why in this day and age of seedless watermelons and stringless green beans, we are still cleaning that glossy floss off ears of corn. If you are a waste-not-want-not sort of person, or have young children who would love a garden tea party (strawberry sandwiches are always a hit), you might want to make corn silk tea. In the words of my former colleague Kempy Minifie, it tastes like a summer day.

When you get your hands on really good sweet corn, it’s almost a criminal offense to overcook it. With ultrafresh ears, I simply chuck them in a pot of boiling water, wait until the water just returns to the boil, then turn off the heat and let the pot sit, covered, until the rest of supper is ready. Lately, it’s been so tender and good that I eat it without any embellishments at all—no salt, no butter, nothing.

But there are times when I want something more, something that will add a grace note to smoky, meaty ribs from a takeout joint or an old-fashioned chicken dinner, complete with snap beans and hot biscuits with blackberry butter.

The recipe below does the trick. Yes, you need a food processor, a fine-mesh sieve or strainer, a saucepan, and a sharp knife, but as the culinary mastermind Richard Olney (who would have been 87 yesterday) once wrote, simplicity can mean perfection or harmony in a dish rather than ease of preparation. In other words, it’s worth it.

Creamless Creamy Corn with Fresh Chives

From The Gourmet Cookbook (Houghton Mifflin, 2004)

The creaminess in this dish comes from the milky juice in the corn itself. This is the essence of fresh corn; the recipe serves four, but you might not want to share. And if you don’t have fresh chives ready to hand, don’t sweat it—shreds of fresh basil are lovely, too.

4 ears corn, shucked

¼ teaspoon coarse salt

¾ teaspoon cornstarch

Pinch of sugar (optional)

2 tablespoons unsalted butter

¼ cup finely chopped onion

1/3 cup water

Freshly ground black pepper

2 tablespoons finely chopped fresh chives

1. Working with 1 ear at a time, lay the cob on its side on a cutting board and cut off the kernels with a large knife, rotating the cob as you go. Transfer the kernels to a bowl, then hold the cob upright in the bowl and scrape with the knife to extract the “milk.”

2. Transfer 2 cups of the corn kernels to a food processor and purée 2 minutes, scraping down the sides of the processor bowl once or twice. Force the purée through a fine-mesh sieve into a bowl; discard the solids. Stir in salt, cornstarch, and sugar if using.

3. Melt the butter in a 2- to 3-quart saucepan over moderately low heat. Add the onion and cook, stirring occasionally, until softened, about 3 minutes. Add the remaining corn kernels, corn milk, and water. Cover and simmer briskly, stirring occasionally, until the corn is crisp-tender, 4 to 5 minutes.

4. Stir the corn purée, then stir into the corn kernels. Bring to a boil, stirring, then reduce heat and simmer, stirring frequently, 2 minutes. (If desired, thin with additional water.) Season with pepper and stir in chives.blog-sweet corn6

BEACH EATS

blog-beach eats-1

Early in the morning, the water looks like a sheet of mercury glass. Being not exactly cool, but not hot, either, it’s an excellent time to walk the beach and think about—well, supper. It’s hours away, but still. Time rolls into itself when you are on vacation, and when a houseful of people need to be fed, it’s important to strategize, and think big.

Up in New York and New England, this usually translates to a shore dinner—briny steamers and lobsters, with their characteristic deep, oceanic tang, bolstered with sweet corn on the cob and boiled potatoes that taste like they were dug yesterday. Which, quite possibly, they were. Our friends Linda and Patricia do a slap-up job of this, giving one of the world’s most hands’-on meals real élan.blog-beach eats1

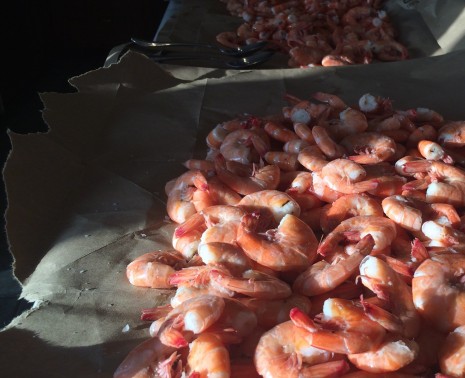
South of the Mason-Dixon Line, however, what I crave is shrimp—local, wild, just-caught shrimp—and lots of them. I’ve written about them before, but a few points bear repeating. I find medium shrimp the easiest size to deal with, and I never fool with deveining. Especially if they’re heads-off, why breach their thin armor, exposing any more of that delicate, tender meat to the elements?

Having come from a long, distinguished line of shrimp lovers, I know to cook the shellfish in the smallest amount of water possible, covering them by about two inches. If you’ve busted loose at the store or roadside shrimp stand and bought 10 or 12 pounds, say (every self-respecting adult I know can put away at least three quarters of a pound), you’ll want to cook them in batches. As far as the seasoning goes, I like to add a quartered lemon and enough sea salt to make cold water from the tap taste like the Atlantic. If you are a fan of Old Bay, Zatarain’s, or a homemade seafood-boil blend, humor me and use a light hand. The point, after all, is the clean, briny-sweet flavor of the shellfish.

You do want to bring the seasoned water to a rolling boil before adding the unpeeled shrimp, but don’t wait until the water returns to a boil before starting the timing. Depending on the size of the shrimp and how many pounds are in the pot, I begin checking for doneness at about two minutes. Once the shrimp are a beautiful rosy-pink on the outside, opaque inside, and firm yet tender in texture, immediately drain them in a colander. Remember that they’ll continue cooking once they’re out of the water; I like to spread them on a kitchen counter covered with brown paper bags, and sprinkle with more sea salt. People should eat them hot out of the shell, with melted butter or cocktail sauce spiked with lemon and horseradish. As far as sides go, how could corn on the cob and new potatoes be bad? Butter beans and rice or grits—ditto.blog-shrimp 2015

Then again, there’s the whole day ahead of me. I could go crabbing.

blog-beach eats3

HIP POCKET RECIPE: BLUEBERRY PUDDING CAKE

blog-blueberries 2015

These days, my former Gourmet colleagues are spread far and wide, but no matter—when we connect, we always seem to pick up pretty much where we left off. We’re still family, in other words, sharing everything from life’s tragedies and triumphs to—no surprise here—recipes old and new.

The other day, I was reminded of the following blueberry pudding cake by Gerald Asher, Gourmet‘s wine editor for 30 years and author, most recently, of A Vineyard in My Glass (available at independent bookstores and online sources). The recipe, which was developed by food editor Melissa Roberts-Matar, made the cover of the July 2005 issue and was a hit with readers and staff alike. I have no idea why it fell out of my summer culinary rotation, but that won’t happen again, for it’s a great example of how to transform very straightforward, plain ingredients into something sublime. The cake is soft, moist, and tender, and the plump berries, briefly cooked until bursting with juice, create an inky, instant sauce.

Especially if your summer weekends revolve around entertaining, you need this recipe in your hip pocket. It can be baked a day ahead of time, and although it’s similar to a cobbler in its beguiling simplicity, it has more finesse. Even if you suffer from F.O.F. (Fear of Flour), it is almost embarrassingly easy to make. And it’s just as delicious for breakfast or brunch as it is after supper.

Happy Fourth of July! See you at the farm stand, over by the berries.

Blueberry Pudding Cake

From the July 2005 issue of Gourmet

Serves 6 to 8

Active time: 15 min    Start to finish: 50 min

1/3 cup plus ½ cup sugar, divided

¼ cup water

1 tablespoon fresh lemon juice

1 teaspoon cornstarch

10 oz blueberries (2 cups)

1 cup all-purpose flour

1¾ teaspoons baking powder

1 teaspoon salt

1 large egg

½ cup whole milk

1 stick unsalted butter, melted and cooled slightly

1 teaspoon pure vanilla extract

1. Put oven rack in middle position and preheat oven to 375ºF. Butter a 9-inch square cake pan or baking dish.

2. Stir together the 1/3 cup sugar, water, lemon juice, and cornstarch in a small saucepan, then stir in blueberries. Bring to a simmer, then simmer, stirring occasionally, 3 minutes. Remove from heat.

3. Whisk together flour, baking powder, salt, and remaining ½ cup sugar in a medium bowl. In a large bowl, whisk together egg, milk, butter, and vanilla, then add flour mixture, whisking until just combined.

4. Spoon batter into pan, spreading evenly, then pour blueberry mixture evenly over batter (berries will sink). Bake until a knife inserted into center of cake portion comes out clean, 25 to 30 minutes. Let cool in pan on a rack 5 minutes.

Cooks’ note: Cake can be made 1 day ahead and cooled completely, uncovered, then kept, wrapped well in foil, at room temperature.

And one addendum: After hearing from a couple of people who wondered whether you can make this with frozen berries, I emailed Melissa, but she didn’t recall if the recipe had been tested with frozen. (It was ten years ago, after all.) “We usually tested frozen fruit with pies with good results,” she wrote. “Use them unthawed. They cook and bake up a bit juicier than fresh, as frozen retains more water, but I don’t want to suggest doubling the cornstarch without having tested it that way. I’m sure it would be fine with the cake batter. Hope this helps!” Love her.
blog-blueberries 2015-2

SHY-SMILE BEET GREENS: A MARKET STORY

blog-beet greens3

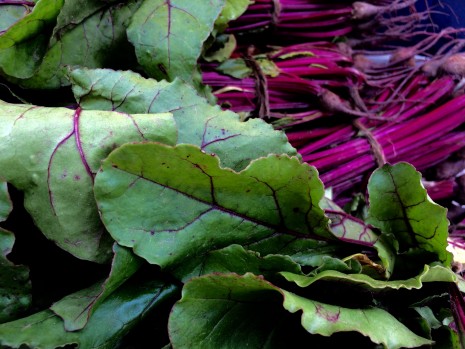
The beet greens I typically encounter at farmers markets play second fiddle to the actual beets. That stands to reason: Most people regard the thick leaves as something to be discarded, asking the seller to remove them before tucking the shorn, diminished root vegetables into a market bag. I have viewed this phenomenon with puzzlement for ages; in fact, it inspired my very first blog post five years ago.

But the Queens County Farm Museum, which sells a beautiful, bountiful array of vegetables, herbs, and cut flowers at the Union Square Greenmarket on Fridays, is bucking the tide, or at least smartly selling the thinnings. (Beets aren’t happy when overcrowded; the edible roots need room to expand into orbs underground.) The Farm Museum occupies New York City’s largest remaining tract (47 acres) of undisturbed farmland; with a history that dates back to 1697, it’s the longest continuously farmed site in New York State. And taking pride of place this past Friday were gorgeous beet greens tethered to vestigial beets by long magenta stems.

That evening, raw beet greens (along with the stems and the teensy beets, scrubbed and sautéed for a nanosecond) stood in for salad, and all I did was add some crumbled Gorgonzola dolce and a drizzle of walnut oil.

Beet greens really come into their own when cooked—they turn lush and silken—but they do shrink down. The next evening, when we had a last-minute dinner guest, they would have made a mingy side, so I channeled the American food writer and bon vivant Eugene Walter, who advocates serving beet greens as a first course in his Hints & Pinches, a chatty compendium originally published in 1991.

“Most people don’t know what the greens are,” Mr. Walter wrote. “Many have simply never tasted beet greens! Such exclamations of joy and mystified enquiries!”

He felt that steamed fresh young beet greens with unsalted butter, salt, and freshly ground black pepper belonged in the same category as the first wild asparagus in Italy and the first young sorrel leaves in France. He served them in individual ramekins with a little tray passed around full of toppings: crumbled crisp bacon, toasted pine nuts, toasted almonds, strips of country ham. With a perfectly straight face, he’d tell his guests that they were eating a form of Turkish cabbage, for instance, or Provençal kale. Only later did he fess up. Sometimes one must tell the plain truth when first asked, then embroider every subsequent version, he explained. But sometimes myth or invention should come first, truth emerging with a shy smile at the end.

Shy-Smile Beet Greens à la Eugene Walter

Pick over your beet greens. Take out older, more wrinkled or yellow leaves. Cut off from roots. Wash in many waters. Tear up, don’t cut. Put in steamer basket, don’t pack too tightly.

Sprinkle a few celery seeds [or not], a light twinkle of freshly ground pepper. Steam until just tender, turning once or twice. Mix with dollops of unsalted butter and hurry to table while hot. Pass a basket of lightly toasted English muffins cut into fingers and a selection of accents as related above.


STRAWBERRIES THREE WAYS

blog-strawberries1

Nothing compares to the rich, profound flavor and fragrance of perfectly ripe strawberries. And since June’s full moon, which occurs tonight, is commonly called the Strawberry Moon, you can guess what’s been on the menu chez Lear. A couple of days ago, I greedily overbought at not one, but several farm stands, and a good thing, too.

7:30 a.m. I started at breakfast, with a bowl of warm, comforting polentina from the recently published Simply Ancient Grains: Fresh and Flavorful Whole Grain Recipes for Living Well, by grain goddess Maria Speck and available at a bookstore near you. I followed her advice to soak the polenta in boiling water overnight, and sure enough, it took just 15 minutes to pull things together this morning. It may have been 50 degrees and pelting rain outside, but the fistful of juicy strawberries I sliced still tasted like the hot sun. I decided not to go back to bed, after all.

Polentina, by the way, is a creamier version of polenta that’s typically served in the morning. “On lazy Sundays, I go all the way and top my bowl with a dollop of softly whipped cream,” writes Speck. How could that be bad?

Breakfast Polentina with Strawberries, Poppy Seeds, and Lime

From Simply Ancient Grains: Fresh and Flavorful Whole Grain Recipes for Living Well (Ten Speed Press), by Maria Speck

Serves 4

1 cup (5.5 ounces) polenta or stone-ground cornmeal, preferably medium grind

2 tablespoons poppy seeds

1½ cups boiling water

1½ cups whole or low-fat milk (1 cup for cornmeal), or more as needed

2 tablespoons plus 2 teaspoons honey, or more as needed

Pinch of fine sea salt

1½ cups (6 ounces) quartered fresh strawberries, preferably organic

½ to 1 teaspoon lime juice

1 teaspoon finely grated lime zest, preferably organic

1. Start the polentina the night before: Add the polenta and the poppy seeds to a large heavy saucepan and whisk in the boiling water. Cover and let sit at room temperature overnight (or chill, covered, for up to 2 days).

2. The next morning, finish the polentina: Add the milk, 2 tablespoons of the honey, and the salt to the saucepan with the polenta and whisk well to loosen, breaking up any clumps. Bring to a boil over medium-high heat, whisking occasionally. Cook, whisking continuously and adjusting the heat to maintain a gentle bubble until the mixture thickens, about 2 minutes (beware of splatters!).

3. Decrease the heat to low to maintain a simmer. Cover and cook, stirring vigorously with a wooden spoon every couple of minutes and scraping the bottom until the polenta becomes creamy and thick (cornmeal remains a little softer), 10 to 12 minutes. The polenta granules will swell and become tender, and the polenta should retain an appealing toothsomeness.

4. Meanwhile, add the strawberries to a small bowl and stir in the 2 teaspoons honey and the lime juice, tasting and adding more of either to adjust. Set aside to macerate, stirring once or twice, while the cornmeal simmers.

5. Remove from the heat, stir in the lime zest, and add a bit more milk if you like a looser polentina. Taste for sweetness and adjust with honey as needed. Spoon into four breakfast bowls, top with the strawberries, arranging them like flower petals in the center of the bowl. Or, if you like more fruit, just pile them on. Serve at once.

Fine Points
Be sure to use weight measures as volume can vary widely, especially when using cornmeal.
Adding hot milk in step two will further speed up your breakfast.
Fresh strawberries are a nice contrast on top, but sliced bananas or blueberries work well too.
If you have leftover cooked wheat berries or farro, add ½ cup with the zest for a nice chew.

*****

6:30 p.m. Good friends are in the neighborhood unexpectedly and call, wondering if they could take us to dinner. Nonsense. Much more fun to sit around our table and share a roast chicken, don’t you think? Roast potatoes and broccoli rabe sautéed with garlic and red chile flakes will round out the meal nicely, and no trouble at all—it was what we were planning, anyway.

But company for supper means not just dessert, but a dessert course. And in strawberry season, that is reason alone for splurging on a fancy bottle of aged balsamic vinegar. Truth be told, our bottle of aceto balsamico tradizionale—the real deal, aged in different wooden barrels until thickened to an almost syrupy liquid—was a bit dusty (I’ve been hoarding it), but it was high time to seize the moment. A drizzling of good balsamic enhances the sweetness of the berries, and it also brings forth their tartness. It’s a beautiful balancing act, and the first bite tends to reduce people to silence. The following recipe, from the Italian cooking authority Faith Willinger, is staggeringly simple.

Strawberries with Balsamic Vinegar

From The Gourmet Cookbook (Houghton Mifflin)

Serves 4

2½ pints (about 2 pounds) of the ripest, most fragrant strawberries you can find, hulled and halved lengthwise, or quartered if large

2 tablespoons aged balsamic vinegar (preferably aceto balsamico tradizionale)

1 tablespoon sugar

¼ teaspoon freshly ground black pepper, or to taste

Unsweetened whipped cream or crème fraîche, for serving

1. Toss the strawberries with the vinegar, sugar, and pepper in a large bowl. Let stand at room temperature, tossing occasionally, for 30 minutes.

2. Toss strawberries again and serve with whipped cream or crème fraîche.

*****

11 p.m. Oh, my goodness, there are still plenty of strawberries left. I told you I overbought. Tomorrow, I’ll make ice cream. The title of the recipe below, by my former Gourmet colleague Andrea Albin, is no exaggeration. This ice cream tastes like summer.

Perfect No-Cook Strawberry Ice Cream

1 pound strawberries, trimmed, halved if large

¾ cup sugar

¾ teaspoon fresh lemon juice

1/8 teaspoon salt

2 cups heavy cream

Equipment: an ice cream maker

1. Coarsely mash strawberries with sugar, lemon juice, and salt using a potato masher in a large bowl. Let stand, stirring and mashing occasionally, 10 minutes.

2. Transfer half of the strawberry mixture to a blender and purée with cream until smooth. Return strawberry cream to bowl with remaining strawberries and chill, stirring occasionally, until very cold, 3 to 6 hours.

3. Freeze mixture in ice cream maker. Transfer to an airtight container and put in freezer to firm up (that is, if you can wait that long). Ice cream keeps 1 week.

A SPRING LEEK GRATIN

blog-leek gratin

In May, there are days when the sun beats down like summertime. And then there are days when the temperature hovers in the 50s, and mist turns into a drizzle so gradually you don’t even notice. Until you are soaked to the skin, that is, and chilled to the bone. I am not complaining for a second, mind you—we need every raindrop that falls—but it complicates matters as far as supper is concerned. That’s when everyone needs something warming and sustaining, yet not remotely wintry.

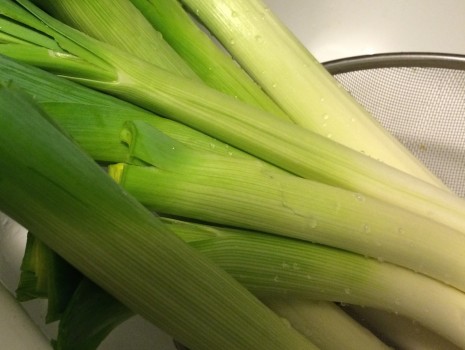
Thank goodness for leeks. They are available pretty much all the time, but in the spring they, like other alliums, are especially juicy and turn lush when cooked. You can get a good idea about how I like to use them (and then some) from this post from 2013. But this year I’m happily stuck on leek gratins.

This is entirely Georgeanne Brennan’s fault. I first learned how simple and versatile gratins were at her cooking school in Haute Provence years ago, and for a long while they were part of my culinary repertoire. Then they fell out of my rotation for some reason; I don’t remember why. I was reminded of their ease and utility, though, when I wrote up a q&a with Georgeanne for The Wall Street Journal back in February. Her leek gratin makes a delicious side to roast chicken, pork chops, or what have you. It also holds its own as a main course; just add a crisp romaine salad and a loaf of good bread. If you want to make it a bit more substantial, scatter shards of cooked ham over the leeks before adding the cheese. Any leftovers are good chopped and worked into an omelet.

One last note: Using a combination of Gruyère and Parmiagiano-Reggiano may seem fussy, but the addition of a little Parm always bumps up the flavor of another cheese. It’s for sass, as my great pal Damon Lee Fowler says.

Georgeanne Brennan’s Leek Gratin

As published in The Wall Street Journal

Total Time: 45 minutes Serves: 2 as a main, 3-4 as a side

8-10 leeks
2 teaspoons coarse salt
2 tablespoons butter, plus more for buttering dish
3 tablespoons all-purpose flour
1¼ cups whole milk or half-and-half, plus more if necessary
¼ teaspoon freshly ground white or black pepper
2 tablespoons freshly grated Parmesan
¼ cup freshly grated Gruyère

1. Preheat oven to 400 degrees. Trim leeks to fit crosswise in a large gratin dish, leaving some of the green on half of leeks. Run cold water into top of each leek, opening layers gently. Use cooking twine to tie leeks in bundles of 3-4. Bring a large pot of water to a boil. Add 1 teaspoon salt, then carefully add leeks to pot. Cook over medium heat until slightly limp but greens are still bright, 8-10 minutes. Drain and set aside.

2. Melt 2 tablespoons butter until foaming in a medium saucepan over medium-high heat. Remove from heat and whisk in flour. Gradually whisk in 1¼ cup milk. Stir in pepper and remaining salt, then place over medium-low heat. Cook sauce, whisking occasionally to prevent lumps, until thickened to the consistency of yogurt, about 15 minutes. If sauce is too thick, whisk in additional milk, 1 tablespoon at a time, to achieve desired consistency.

3. Butter gratin dish, then spoon in about ¼ cup sauce. Place leeks over sauce in a single layer, alternating green and white ends. Spoon about ¾ cup sauce over leeks, but do not fully cover.

4. Sprinkle cheeses over leeks and bake until sauce begins to bubble and surface begins to turn golden brown, about 15 minutes. For more color, briefly place under broiler. Serve hot or warm.

I BRAKE FOR LOCAL ASPARAGUS

blog-asparagus2015

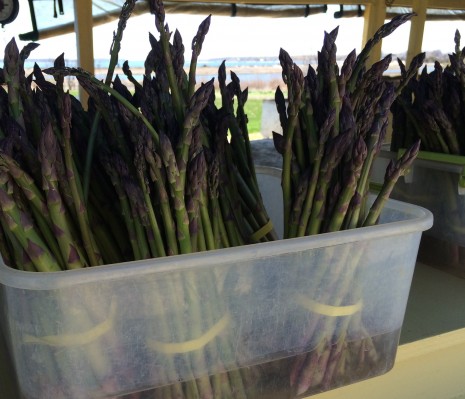
It looks like spring, smells like spring, feels like spring. And now that local farm stands are proudly displaying the first asparagus of the season, it really is spring. I busted loose at Latham’s, run by a family that has farmed this part of the North Fork of Long Island for generations. All that separates the sturdy butter-yellow structure from Orient Harbor is a long, broad, gently sloping field, and every time I pull off the road there, I’m reminded of just how rare maritime farmland is in this part of the world.

I’m also reminded of what true luxury is: the chance to buy asparagus that was picked an hour or so ago, then going home to fix it for lunch. I was in such a hurry, I didn’t even cook it.

Instead, I made the salad below. The recipe is from The Zuni Cafe Cookbook, by the late influential San Francisco chef Judy Rodgers and tweaked (in order to serve six) for the March 2002 issue of Gourmet. Rodgers used lamb’s lettuce (a.k.a. mâche), but any soft, tender butterhead lettuce will do the trick. Use fleshy jumbo asparagus, she advises, and the purple variety if you can find it; since it’s served raw, it will retain its color. “You may be surprised to learn that the stem of any spear of asparagus is sweeter than the tip, especially raw,” she wrote. “So trim off the pretty tips and save them for risotto, or pasta.” Nice in an omelet or stir-fry, too.

“By itself, this spring salad makes a good first course,” Rodgers added. “It is delicious and lovely piled in a small mound on thinly sliced prosciutto.” And how.

I picked out the largest spears from my haul for one of the most immediately gratifying lunches ever, and saved their tips as well as the slender spears for another meal. Which was dinner.

Lettuce with Raw Asparagus, Pistachios, & Parmigiano-Reggiano

Adapted from The Zuni Cafe Cookbook, by Judy Rodgers, with thanks to Gourmet 

Serves 6

2 tablespoons shelled unsalted pistachios

¼ cup extra-virgin olive oil

1 tablespoon Champagne vinegar or white-wine vinegar

Coarse salt

6 very fresh jumbo asparagus spears (or the largest you can find; about 9 ounces), trimmed

3 ounces lamb’s lettuce (mâche), trimmed, or butterhead lettuce leaves, torn into bite-size pieces (about 12 cups)

An enjoyable amount of Parmigiano-Reggiano shavings (use a vegetable peeler)

1. Preheat the oven to 350º. Warm the pistachios on a baking sheet 2 to 3 minutes to intensify their flavor, then coarsely chop.

2. Whisk together the oil, vinegar, and salt to taste.

3. Cut the tips from the asparagus and reserve for another use. Starting at the tip end, cut asparagus into very thin (about 1/8-inch-thick) slices on a long diagonal.

4. Gently toss the lettuce with the asparagus, pistachios, and just enough vinaigrette to coat, then season salad with salt and pepper. Top with the Parmigiano shavings and devour immediately.

blog-asparagus2015-2

OF MIMI SHERATON AND MA-PO TOFU, OR 1,000 FOODS TO EAT BEFORE YOU DIE … PLUS 1

blog-mimi sheraton

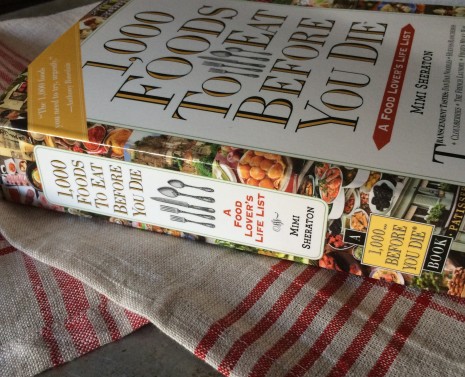
I wish I could say that 1,000 Foods To Eat Before You Die: A Food Lover’s Life List, the latest book by journalist, restaurant critic, and national treasure Mimi Sheraton, was the sort of thing I kept next to the bed, for dipping into last thing at night.

But it makes me too hungry. I end up in the kitchen at midnight, eating scrambled eggs when what I really want is arista alla fiorentina—the rosemary-scented roast pork of Tuscany—or schokoladen topfenpalatschinken—tender, airy cheese-filled crêpes draped with chocolate sauce—or an order of dan-dan noodles from Wu Liang Ye, if the place weren’t already closed for the night. No, I prefer devouring the book in big greedy chunks, like a novel, and on a lazy weekend, when there’s time to shop and cook, or book a table or—what the hell—a plane ticket.

1,000 Foods is global in scope, divided by cuisine and encompassing the humble and haute, the familiar and exotic. Each entry comes with rich crumbles of context as well as useful information about where to find the dish or ingredient, and perhaps a recipe or bibliographic note. What elevates it from an idiosyncratic jumble to a vast, original mosaic of flavors is Sheraton’s flair and discernment—six decades’ worth. I can’t think of anyone else who could have written this book.

I had the chance to hear Sheraton talk about the book and much more in an interview with Dan Pashman, host of WNYC’s podcast The Sporkful, at last weekend’s Food Book Fair, in Williamsburg, Brooklyn. A number of the Bright Young Foodies in the audience didn’t seem to know who Mimi Sheraton was, exactly, but by the end of the session, they were virtually sitting at her feet. As well they should.

Sheraton’s conversation, like her writing, is fresh, funny, direct, and free of pretension, condescension, or the I’m-an-insider-and-you’re-not tone that creeps into too much food writing (and too many panel discussions) these days. Her thoughts on the effort, knowledge, pondering, and overall discipline it takes to evaluate food (“I was once in a car with 104 pastrami and corned beef sandwiches”) took me back to my years at Gourmet, where assessing six different chocolate cakes before breakfast, for instance, or one-bite-and-pass-the-plate research dinners were part of the job, and an ongoing education. “It doesn’t matter if you are in the mood or not, if you’re a professional,” Sheraton tried to explain. She’s a self-described “bestavore,” interested in the finest of a food’s type—the benchmark—no matter where it comes from. In another life, she would have been a superb dog-show judge.

1,000 Foods was supposed to be done in two years, but instead took almost ten. I can believe it. Having worked on two big Gourmet compilations—The Gourmet Cookbook and Gourmet Today—I’m sure Sheraton’s selection process was fraught. Her big regret is that one of her favorite comfort foods in the world, Sichuan ma-po tofu, got lost in the shuffle. She just plain forgot to write the dratted thing, and the oversight wasn’t discovered until the book was almost in bound galleys. Just typing that last sentence gave me the wobblies.

You never know, ma-po tofu could be the subject of Sheraton’s next book, or the impetus for 1,000 More Foods to Eat Before You Die. Or dinner.

Now to a recipe for the spicy classic, and its backstory. Ma-po tofu is supposedly named for the pockmarked (ma) old woman (po) who created the dish for her husband’s restaurant. The recipe below is from a piece called “A Journey of 1,000 Dishes” (yes, really) by Margy Rochlin; it appeared in the June 2000 issue of Gourmet. Margy’s spectacular eating tour of China was led by Chinese authority Barbara Tropp, who had made a version of the dish for years. At culinary school in Chengdu, the capital of Sichuan province, Tropp learned the technique of poaching the tofu before stir-frying to freshen and tenderize it.

The quality of Asian ingredients varies from brand to brand. Tropp, who died in 2001, felt that the specific ones mentioned in the recipe give the right flavor to the dish. And you may be interested in the fact that aromatic, tongue-tingling Sichuan peppercorns aren’t true peppercorns, which are harvested from the Piper nigrum vine, but are related to the Japanese spice sansho, which is sometimes labeled “Japanese pepper.” Both spices are made from the dried fruits of prickly ash trees (Zanthoxylum simulans and Z. piperitum).

Ma-Po Tofu à la Barbara Tropp

From the June 2000 issue of Gourmet 

Serves 3 or 4 (main course)

For sauce

¾ cup chicken broth

2 tablespoons Chinese hot bean paste, preferably Szechuan brand

2 tablespoons soy sauce, preferably Kikkoman regular or Pearl River Bridge dark (black or mushroom)

Kosher salt, preferably Diamond Crystal, to taste

For tofu

1 pound regular or soft (not silken) tofu, drained and cut into ½-inch cubes

1½ to 2 tablespoons corn, peanut, or canola oil

½ pound ground pork shoulder, preferably 75% lean

4 teaspoons finely minced garlic

4 teaspoons finely minced peeled fresh ginger

1 tablespoon cornstarch, dissolved in 2 tablespoons water

1½ teaspoons pure roasted sesame oil, preferably Kadoya brand

½ to 1 teaspoon Toasted Sichuan Peppercorn Powder (see below), or ½ teaspoon sansho plus 1/8 to ¼ teaspoon freshly ground black pepper

3 tablespoons thinly sliced scallions

Accompaniment: cooked rice

1. Make the sauce: Stir together broth, bean paste, soy sauce, and salt in a small bowl.

2. Poach the tofu and cook the pork: Slide tofu into a saucepan of simmering water and keep at a bare simmer. While it’s simmering, heat a wok or large heavy skillet over high heat until hot. Add 1½ tablespoons corn oil, swirling to coat. Add pork and stir-fry, breaking up limps and adding remaining ½ tablespoon corn oil if meat sticks, until no longer pink. Add garlic and ginger and stir-fry over moderate heat until very fragrant, about 2 minutes.

3. Finish the stir-fry: Stir reserved sauce, then add to pork and bring to a simmer. Drain tofu in a large sieve and slide into sauce, stirring gently. Stir cornstarch mixture and add to stir-fry. Bring to a boil, stirring gently, and cook until thickened and glossy, about 15 seconds.

4. Turn off the heat and sprinkle with sesame oil, Sichuan-peppercorn powder to taste, and 2 tablespoons scallions. Stir once or twice, then serve sprinkled with remaining tablespoon scallions.


Toasted Sichuan-Peppercorn Powder à la Barbara Tropp

Makes about ¼ cup

I know you need just a small amount of this for Ma-Po Tofu, but it’s difficult to grind less than ¼ cup Sichuan peppercorns at a time. Use the extra powder in other stir-fries, seasoning rubs (it’s especially good on duck), and on flatbreads.

1. Shake ¼ cup Sichuan peppercorns in a sieve to get rid of dust, then spread in batches on a white plate and discard any twigs, leaves, thorns, or black inner seeds (they’re bitter).

2. Toast the peppercorns in a dry heavy skillet over moderate heat, stirring, until very fragrant and smoking, 3 to 5 minutes (don’t let them burn).

3. While still hot, grind to a powder in an electric coffee/spice grinder and sift through a fine sieve, discarding hulls. Keep the powder in an airtight container away from heat and light and discard when it loses its pungency.

SPRING FLING: PASTA PRIMAVERA

blog-pasta primavera

Given the hard winter and cold, snowy spring we’ve had in the Northeast, the growing season is weeks behind schedule. Heaven knows when we’ll see the first local asparagus and peas—let alone tender, slender green beans and (dare to dream!) sun-ripened tomatoes. In other words, a visit to the farmers market is more about foraging than shopping.

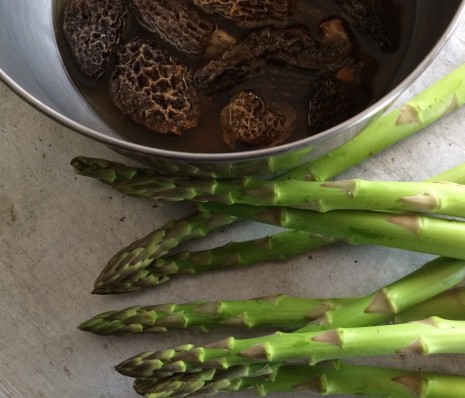
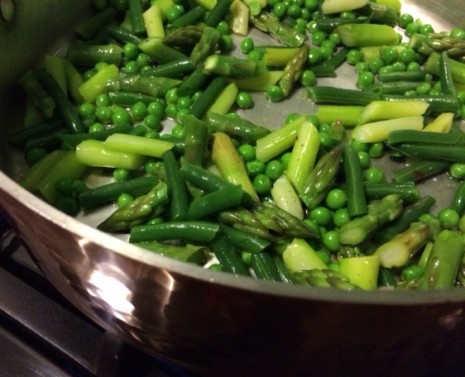
So for a dinner party last week, I thanked my lucky stars for the too-often-unsung bounty at my local supermarket. Asparagus and green beans have become, for better or worse, seasonless—a quality held in high esteem ever since there have been market gardeners—and frozen baby peas (I’m a Birds Eye girl) are more consistently sweet, tender, and less starchy than the vast majority of “fresh” peas available in season. Plus, a bottle of dried morels has been burning a hole in my pantry, so to speak, ever since Christmas. Admittedly, they are a luxury, but their nutty earthiness plays beautifully with other flavors without overwhelming them, and they have a famous affinity for cream sauces.

Pasta primavera has undeniable glamour and a provenance to match: It was introduced in the 1970s at Le Cirque, in New York City, and soon became the pasta dish of the moment. It makes an elegant first course for a crowd and is substantial enough for a vegetarian main course.

Don’t let the long ingredient list below throw you: Chopping is about as complicated as the prep work gets, assembly is a snap, and permutations will make the dish your own. Substitute strozzapreti or other short, curvaceous pasta shape for the spaghettini, for instance, or skip the pasta entirely and stir the fixings into a pot of risotto. If there are no good-looking green beans to be had, zucchini will do nicely. If time is an issue, rein things in in a way that works for you. One step that does make a difference, though, is cooking the tomatoes and vinegar into a quick little sauce. It adds a hit of fresh-tasting acidity that you’d miss if it weren’t there.

Pasta Primavera

From The Gourmet Cookbook (Houghton Mifflin, 2004)

Serves 10 as a first course, 6 as a main course

1 oz dried morel mushrooms
1 1/2 cups warm water
1/2 lb asparagus, trimmed and cut into 1-inch pieces
1/4 lb green beans (preferably haricots verts), trimmed and cut into 1-inch pieces
3/4 cup frozen baby peas, thawed
2 teaspoons minced garlic, divided
Rounded 1/2 teaspoon dried hot red pepper flakes, divided
4 tablespoons extra-virgin olive oil, divided
1 1/2 pints grape tomatoes
1 tablespoon balsamic vinegar
3 tablespoons water
1 lb spaghettini (thin spaghetti)
1/2 stick unsalted butter
2/3 cup heavy cream
1 teaspoon finely grated fresh lemon zest
1 cup finely grated Parmigiano-Reggiano
1/4 cup finely chopped fresh flat-leaf parsley
1/4 cup finely chopped fresh basil
1/3 cup pine nuts, lightly toasted
Garnish: Parmigiano-Reggiano shavings

Prepare green vegetables: Soak morels in warm water in a small bowl 30 minutes. Lift mushrooms out of water, squeezing excess liquid back into bowl. Pour soaking liquid through a sieve lined with a dampened paper towel into a small bowl and reserve. Rinse morels thoroughly to remove grit, then squeeze dry. Discard any tough stems. Halve small morels lengthwise and quarter larger ones.

Cook asparagus and beans in a 6- to 8-quart pot of boiling salted water, uncovered, 3 minutes. Add peas and cook until beans and asparagus are just tender, about 1 to 2 minutes more. Immediately transfer vegetables with a large slotted spoon to a bowl of ice water to stop cooking, reserving hot water in pot for cooking pasta. Drain cooled vegetables in a colander.

Cook 1 teaspoon garlic and a rounded 1/4 teaspoon red pepper flakes in 2 tablespoons oil in a 10- to 12-inch heavy skillet over moderately low heat, stirring, just until garlic is fragrant, about 1 minute. Add drained vegetables and salt and pepper to taste and cook, stirring, 2 minutes, then transfer to a bowl. Reserve skillet.

Cook tomatoes: Cut half of tomatoes into quarters and halve remainder lengthwise, keeping quarters and halves separate. Cook remaining teaspoon garlic and remaining rounded 1/4 teaspoon red pepper flakes in remaining 2 tablespoons oil in skillet over moderately low heat, stirring, just until garlic is fragrant, about 1 minute. Add quartered tomatoes with salt and pepper to taste and simmer, stirring occasionally, until tomatoes are softened, about 3 minutes. Add halved tomatoes, vinegar, and water and simmer, stirring occasionally, until sauce is thickened and halved tomatoes are softened, 3 to 4 minutes. Keep tomatoes warm.

Cook pasta and assemble dish: While tomatoes are cooking, return water in pot to a boil and cook pasta until al dente. Drain in a colander. Immediately add butter, cream, zest, and morels to empty pasta pot and simmer gently, uncovered, 2 minutes. Stir in cheese and add pasta, tossing to coat and adding as much of reserved morel soaking liquid as necessary (1/2 to 2/3 cup) to keep pasta well coated. Add green vegetables, parsley, basil, pine nuts, and salt and pepper to taste and toss gently to combine. Serve pasta topped with tomatoes and Parmigiano-Reggiano shavings.

blog-pasta primavera2

BUTTERY BRAISED ENDIVES

blog-braised endives

It took me a long time before I could admit how much I dislike barely cooked vegetables. I realize I am in the minority; most folks love them, especially this time of year, when heavy winter food has palled. Granted, their crispness and bright colors have a clean, minimalist appeal, but I find them squeaky in the mouth and one-dimensional in flavor.

I prefer my cooked vegetables well done—that is, with a tender, yielding consistency that stops short of falling apart. When I have tried to explain this to people, they can’t get beyond my heritage and the pervasive yet misguided notion that to a southerner the only good vegetable is a mushy vegetable. It makes me sad that they’ve never had an honest southern meal, one in which vegetables are treated with respect.

In that regard, good southern cooks have much in common with their counterparts in France or Italy—they all know there is a world of difference between overcooking and slow, gentle cooking. The technique of braising vegetables in a little liquid until they’re soft and tender, for instance, allows a give-and-take between the braising juices and the vegetables themselves. The resulting layers of flavor are a revelation.

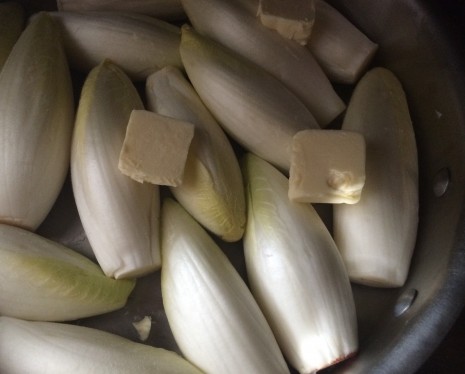
One of my favorite vegetables for braising is belgian endive. Its slight, pleasant bitterness is a clue that it’s related to edgier greens such as escarole, frisée, radicchio, and other members of the Chicorium genus. The vegetable has long been grown around Brussels, and the industry has spread to the Netherlands, France, Spain, South America, and California. Belgian endive cultivation takes time and is labor intensive, so it is not cheap. You get lots of bang for the buck, though: There is practically no waste, and the only cleaning that’s necessary is a quick rinse under cold running water.

The pearly leaves, which are at once crunchy and satiny, make a dramatic salad when cut crosswise and tossed with a darker green, or a sturdy vehicle for creamed blue cheese. But braising, which coaxes out the rich, nutty sweetness that lies just beneath the surface, transforms it into a far more interesting vegetable, one that can stand alone as a first course or pair nicely with roast chicken or lamb, or grilled steak or fish.

For all its elegance, belgian endive is a forgiving vegetable, and braising is a forgiving technique, so it’s pretty much impossible to go wrong. Below you’ll find two versions, and I’m very fond of them both. As for any embellishments, they’re up to you. You could cut the endives in half lengthwise and wrap each half in a paper-thin slice of pancetta or prosciutto, say, or perhaps add a bit of cream at the end, or even tuck in slivers of ham, then top with grated Gruyère and run under the broiler until the cheese is golden in places.

I like to braise vegetables in a sauté pan—that is, a deep straight-sided skillet—or a low, wide clay pot, but a flameproof gratin dish works well, too. In any case, choose a size that will just hold the endives side by side. A braise can’t be rushed, so give yourself plenty of time—or make it a day ahead and reheat it gently.

Braised Endives à la Julia Child

Adapted from The Way to Cook (Alfred A. Knopf, 1989), by Julia Child

Serves 6

12 endives—fresh, firm, and fat, all the same size, all creamy white, and all neatly closed at the pointed end

¼ teaspoon coarse salt, plus a little more, if needed

½ cup water

½ tablespoon fresh lemon juice, plus a little more if needed

2 to 4 tablespoons butter, cut into slices

2 to 3 tablespoons chopped fresh parsley (optional)

1.  Remove any wilted outer leaves from the endives. Trim the root ends but keep the leaves attached. Rinse under cold running water.

2. Arrange the endives in a sauté pan or flameproof clay casserole or gratin dish and add the salt, water, lemon juice, and butter. Cover and boil slowly on top of the stove for about 20 minutes, or until the endives are fairly tender and the liquid is reduced by half. Either cover and cook slowly on top of the stove or lay buttered parchment paper over the endives, cover, and braise in a 325ºF oven until very tender, pale golden in color, and almost all the liquid is evaporated, about 1 hour. Taste and correct seasoning halfway through. Serve sprinkled with parsley if desired.

Braised Endives à la Richard Olney

Adapted from Lulu’s Provençal Table (HarperCollins, 1994), by Richard Olney

Serves 6

4 tablespoons butter, cut into slices

12 belgian endives

Coarse salt and freshly ground pepper

¼ cup dry white wine

½ lemon

1. Remove any wilted or discolored outer leaves from the endives. Trim the root ends but keep the leaves attached. Give them a quick rinse and pat dry.

2. Smear about half the butter in a sauté pan, or a flameproof clay casserole or gratin dish and fit in the endives. Top with the remaining butter and season with salt. Cover the endives with a piece of parchment paper and then a lid or foil.

3. Gently cook the endives over low heat in the butter and the liquid released by the endives, turning them over when golden on the underside. When no more liquid remains in the pan, add a couple of tablespoons wine. Continue to cook, adding a bit of wine from time to time to keep the bottom of the pan moist. When the endives are golden brown on all sides, meltingly tender but still intact, squeeze over a few drops of lemon juice, grind over pepper, turn them around in their juices, and serve directly from their cooking vessel.