Subscribe:

Enter your email address:

Delivered by FeedBurner

Previous Posts

Categories

Site search


SO LONG, SEE YOU NEXT WEEK

Flip-flops.

Shorts.

T-shirts.

Bathing suits (three, but they fold up to practically nothing).

Sunscreen (lots).

Bringing Up the Bodies (the sequel to Wolf Hall, yum-yum) plus the usual pile of mysteries.

Well, okay. Traveling light-ish. But everything fits in my new favorite tote, just under 30 bucks and made from “95 percent post-consumer material” by a company called Blue Q. I saw it at Flight 001 (96 Greenwich Ave. and other locations; flight001.com) and pounced.

You be good and stay sweet.

PLUMS FROM FROG HOLLOW FARM

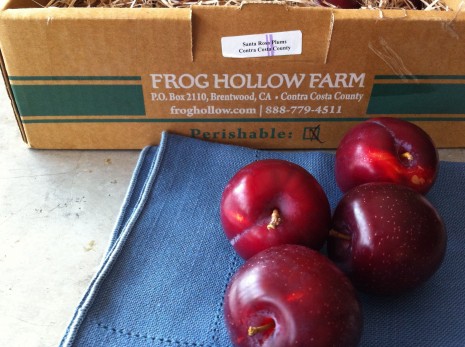
We’re marking the Fourth of July with Santa Rosa plums from Al Courchesne’s Frog Hollow Farm, in northern California. Frog Hollow has been supplying the Bay Area with organic fruit for more than 20 years, and if you miss their crop of Santa Rosas, don’t despair—there are plenty more summer offerings to come.

Santa Rosa is what I think of when I think “plum.” It has full-on sweet-tart flavor, rich aroma, lush flesh … and a grand American history. The variety was bred in 1906 by the celebrated horticulturalist Luther Burbank (1849–1926) at his plant-research center. Named for its birthplace, the plum is arguably his crowning achievement.

The taut, thin skin of a perfectly ripe Santa Rosa pops when you bite into it, and it’s best if you’re leaning over the kitchen sink. I have this image of the poet William Carlos Williams doing so, whisking his tie out of the way at the last second, before turning bad behavior into art in “This is Just To Say”: “I have eaten / the plums / that were in / the icebox / and which / you were probably / saving / for breakfast. / Forgive me / they were delicious / so sweet / and so cold.”

What a scamp. Williams is hardly offering an apology, as Sean Cole points out on This American Life. This is also one of the most parodied poems around, he adds, and invites David Rakoff, Sarah Vowell, and others to join in the fun here.

The Williamses and their icebox aside, plums won’t continue to ripen if chilled. Keep them at room temperature (and out of direct sunlight) instead. “If you must refrigerate them,” reads the careful, can’t-miss note inside the Frog Hollow box, “store ripe fruit unwashed and allow to return to room temperature before eating.” Another tip from the legendary purveyor? Never cluster or stack stone fruits—that leads to uneven ripening or bruising. So spread out your bounty onto a platter instead of piling it into a bowl.

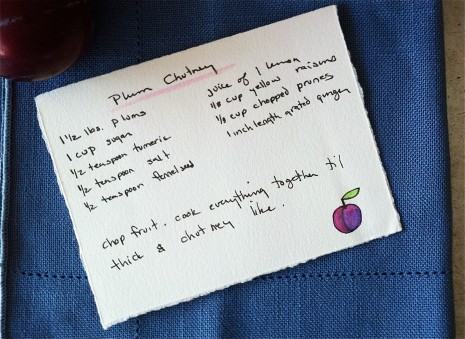
I’m dithering about what to do with our haul. A galette is always appealing, as is an upside-down cake. But I also really like putting ripe plums, cut into wedges, in a pan, sprinkling them with sugar, and sautéing them with a little ginger until they just begin to break down. They are so juicy that no butter is needed for cooking, and you can serve them warm or at room temperature. and embellished with crème fraîche. If I have any plums left, I’ll reach for the plum chutney recipe (below) from our friend Elaine Greenstein. It is fabulous with grilled pork or chicken, and summer isn’t summer without it.

Then again, we may just eat our plums out of hand, leaning over the kitchen sink.


STRAWBERRIES WITH MADEIRA AND ORANGE

Strawberry shortcake has its place. I’m not saying it doesn’t. But if you are inclined to take the path of least resistance, then it’s hard to beat strawberries macerated in a little sugar, orange juice, and Madeira or Sherry.

This is far from a new idea. Stephen Schmidt, culinary historian, cooking teacher, and author of a forthcoming history of American home desserts, pointed me toward the combination of orange juice and Madeira or Sherry in Fannie Farmer’s wine jellies. “It may have been popular somewhat earlier,” he explained. “Eliza Leslie flavors her 1837 calves’ feet jelly, which is basically a wine jelly, with lemon juice and Madeira.

Macerated fresh fruit was a Victorian fad borrowed from the French, he added. Sure enough, in one of Eliza Leslie’s later compilations, Miss Leslie’s New Cookery Book of 1857, you will find Strawberries in Wine; there’s no citrus, but the author does specify Madeira or Sherry. The berries are “served at parties in small glass saucers,” she noted, “heaped on the top with whipped cream, or with white ice cream.”

My grandmother used glass saucers for serving as well—they hold a puddle of winey juices very nicely—but her rationale behind macerated strawberries wasn’t a special occasion but a too-hot-to-bake day. By late June, her house would be dim and shadowy, the long windows shuttered to keep out the heat and bright shafts of sunlight. Preparations for the evening meal—a pot of snap beans set to simmer, for instance—usually began in the cool of the morning, after the breakfast things were cleared away. A “strawberry bowl,” however, was left until the drowsy afternoon. I’d be pulled away from Nancy Drew to help wash a colander full of the ripe fruit (“always leave the caps on, dear, so they don’t get waterlogged”) and pat them dry with well-worn tea towels reserved for just that purpose. Trying to copy my grandmother’s neat, economical flick of the wrist made quick work (or so I thought) of hulling.

You may wonder if a fortified wine such as Madeira or Sherry (or Port, if that’s your preference) will overpower strawberries, one of the softest, most perishable fruits, but I’m reminded of the “Nobody puts Baby in a corner” line from the movie Dirty Dancing. Although each wine adds its singular, supple balance of sweetness and acidity to the berries, the fruit not only holds its own but gains extra resonance. This is a decided plus if the weather hasn’t been co-operative; strawberries need warm sunny days and cooler nights for peak flavor and fragrance.

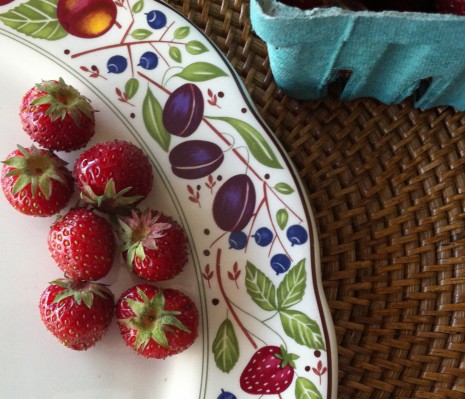
Strawberries aren’t often marketed under their variety names—here in the Northeast, small day-neutral Tristars, shown above, are an exception that will grace local farmers markets all summer long. In general, let aroma be your primary guide when shopping.

Whipped cream or vanilla ice cream à la Eliza Leslie are perfectly fine accompaniments to macerated strawberries, but my grandmother’s favorite embellishment was actually a exercise in household economy: leftover (i.e., slightly stale) sponge cake or pound cake, cut into fingers or cubes and toasted. The end result was modest and restrained yet completely refreshing, and afterward, everyone at the table stood up, ready for a game of cards or Parcheesi. What I realize I’m ready for, though, is a set of Victorian cut-glass saucers. And maybe some Nancy Drew.

 Strawberries with Madeira and Orange

1 quart ripe strawberries

Sugar to taste

About ¼ cup orange juice, freshly squeezed if possible

About  ¼ cup medium-dry Madeira or Sherry

1. Quickly rinse the strawberries and pat them dry. Hull them with a paring knife and put the whole berries (halve them if large) in a serving bowl.

2. Generously sprinkle them with sugar and gently stir in o.j. and Madeira. Refrigerate, covered, until the berries release their juices and the flavors have a chance to play well together, about 2 hours.


COLESLAW THREE WAYS

Coleslaw gives coolness and snap to almost any summer meal. It transcends the categories of salad, side, relish, sandwich topping with confidence and ease. And as with other age-old dishes, variations abound. Here are three of my favorites.

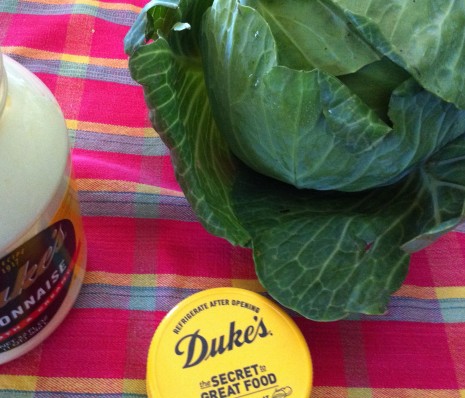
Craig Claiborne’s coleslaw, below, is an homage to the straightforward type you’ll find in Goldsboro, North Carolina, a city known for the style of barbecue you get in the eastern part of the state. For the uninitiated, that’s whole hog meat that’s been chopped fine and seasoned with a thin, non-tomatoey vinegar-based sauce. Order a barbecue sandwich and on top or alongside comes a creamy coleslaw to offset the tang of the sauce. It is one of the world’s great flavor combinations, and right now, I’m intensely regretting the circumstances that are keeping me here in New York, and not packing for the Southern Foodways Alliance Carolina Field Trip later this week.

At least my shipment of Duke’s mayonnaise arrived, and a good thing, too; we were coming to the end of our last jar. If you grew up with Hellmann’s, you may presume that because Duke’s is a southern brand (it was created by Eugenia Duke in 1917, in Greensboro, South Carolina), it must be cloying. Not no, but hell, no. Simultaneously rich and fresh tasting, it’s the only major brand of mayo that doesn’t contain any sugar.

Since the 1960s, however, it has contained soybean oil—today, a red flag to anyone trying to keep GMOs out of their food. According to the customer service folks at Duke’s (owned by C.F. Sauer Company since 1929), the original oil used was probably cottonseed, so I can’t get my nose too much out of joint here. Still, wouldn’t it be great if companies like Sauer agitated for increased availability of non-GMO oil?

Goldsboro Coleslaw 

Adapted from Craig Claiborne’s Southern Cooking (Times Books, 1987)

Serves about 6

The last two ingredients in this recipe—a tiny amount of sugar and cayenne or smoked paprika—are our usual embellishments, but my husband and I will often include grated carrot as well. If you’re serving the slaw with seafood—boiled shrimp or crab cakes, say, or lobster rolls—stir in a smidgen of fresh lemon zest and a drizzle of lemon juice. For a tangier coleslaw, replace some of the mayo with a dollop of sour cream. When tinkering, don’t forget to taste as you go. You can always add more mayo, salt, or cayenne, for instance, but you can’t remove them once they’ve joined the party.

1 small cabbage (about 1½ pounds)

1½ cups mayonnaise

1 cup finely chopped onion

Coarse salt and freshly ground pepper

A scant ½ teaspoon sugar (optional)

A pinch of cayenne or Spanish smoked paprika

1. Remove the core of the cabbage and the tough or blemished outer leaves. Cut the head in half and shred fine. There should be 6 cups. Coarsely chop the shreds and put them into a mixing bowl.

2. Add the mayonnaise, onion, salt, and pepper and toss to blend well. Let the slaw sit about 30 minutes so the cabbage wilts a bit and the flavors have a chance to mingle.
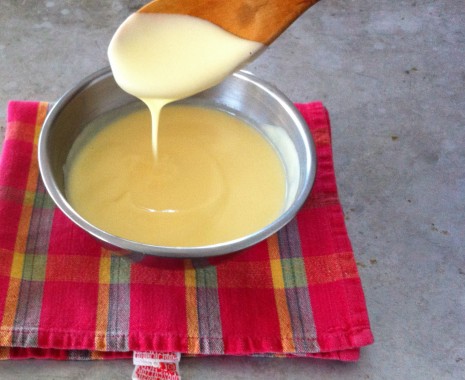
Now, I am perfectly aware of the fact that I could make my own mayonnaise. But after almost 20 years at Gourmet—where we all had to be mindful of food safety issues—uncooked eggs, even organic ones, are risky, and I just don’t want to be the enabler of a Salmonella outbreak. Instead, when I have a yearning for my grandmother’s—or great-grandmother’s—coleslaw and 15 minutes to spare, I make boiled dressing, which isn’t boiled at all, but gently cooked until it reaches a satin-smooth, custardy consistency.

The recipe below may sound rich as all get out, but it is remarkably pure and clean in flavor. It makes a great egg-safe alternative to homemade mayo in coleslaw, potato salad, egg salad, or deviled eggs, and will take asparagus or green beans to the moon and back.

Boiled Dressing for Old-Fashioned Coleslaw

Adapted from Gourmet

Makes 1½ cups

3 large egg yolks

1 tablespoon all-purpose flour

1 tablespoon sugar

1 teaspoon coarse salt

1 teaspoon dry mustard

1¼ cups whole milk

1 tablespoon cider vinegar

3 tablespoons unsalted butter, cut into small pieces

1. Whisk together the egg yolks, flour, sugar, salt, and dry mustard in a 1-quart heavy-bottomed saucepan. Then gradually whisk in the milk and vinegar.

2. Cook gently (do not let boil) over moderately low heat, stirring constantly with a wooden spoon, until the mixture is thickened (you’ll feel the change in your wrist) and just registers 160ºF on an instant-read thermometer.

3. Immediately pour through a fine sieve into a bowl, then stir in the butter until melted. Put the bowl in a larger bowl of ice and cold water and let cool, stirring occasionally. Cover the surface with wax paper before refrigerating in an airtight container. Boiled dressing keeps at least a week, but you will probably eat it up before then.
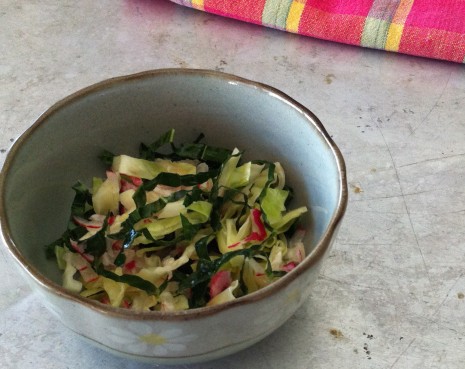
Even though my heart belongs to creamy coleslaws, there are times when I want something lighter and brighter. That’s where this slaw comes in. It isn’t as dressed as a classic slaw; instead it gets presence from toasted Asian sesame oil, the dark brown, roasty-toasty type that’s used as a condiment, not for cooking. This slaw also turns out to be extremely handy when you need to improvise an hors d’oeuvre (serve in endive or radicchio leaves) or a first course. Crisp slivers of kohlrabi or summer’s first turnips are among my swaps for the kale. Any leftovers are delicious for lunch the next day.

Coleslaw with Kale and Radishes 

When I said “improvise” above, I wasn’t kidding. I put this together in about ten (desperate) minutes last week, and did I even think about measuring? No such luck.

About 1 pound of cabbage, cored and sliced thin

A few leaves of fresh, tender kale (I used lacinato)

A handful of radishes, trimmed

Coarse salt

Safflower oil, canola oil (preferably non-GMO), or very mild extra-virgin olive oil

Rice vinegar

Toasted Asian sesame oil

1. Put the cabbage in a bowl. If your kale is young and the stems and center ribs are tender, count your blessings and don’t bother to discard them. Simply stack the leaves, roll them up tightly, like a cigar, and cut them into very thin slices. Add them to the cabbage. Holding a box grater over the bowl, grate the radishes on the large holes directly into the slaw. Lightly season with salt and let sit about 15 minutes, while you tidy up for company.

2. Gently toss the slaw with a drizzle of safflower oil and some rice vinegar. Taste, then toss with a little of the toasted sesame oil. Taste again and adjust seasoning.

IT’S ROOT BEER SEASON

June 10 was National Black Cow Day, and even though we celebrated in style, I realized I don’t really need a reason to pop the cap off a frosty bottle of root beer. The most sentimental of soft drinks, it reminds me of backyard picnics on a chenille bedspread, Sunday afternoons at a minor league ballpark, cruising a honky-tonk beach strip with the top down. I love the dark, creamy, carbonated herb-flavored elixir perfectly straight, poured over scoops of vanilla, or turned into an icy granita. You can even put all the elements together, then add some Root liqueur for a very grown-up dessert.

One of my favorite places to get a fix is Weber’s Famous Root Beer* in Pennsauken, New Jersey. I had my first Weber’s root beer float a few years ago, on a roadtrip with Molly O’Neill, the food goddess behind the cook n scribble website. Ever since, a stop at Weber’s is part of any jaunt down to Philadelphia or points south.

Along with two other independently owned Weber’s franchises in New Jersey, the Pennsauken drive-in is an offshoot of a restaurant that opened in Tulsa, Oklahoma, in 1933. Although it retains its circa-1951 amenities—turn on your headlights for car-hop service—it dishes out burgers, pork roll sandwiches, franks, and more without a trace of irony. Weber’s is vintage, not kitsch.

A well-made root beer is rich and mellow, with a decided whang to it; you don’t need a supersized serving to feel satisfied. That said, you can also buy Weber’s freshly made root beer by the gallon jug—a wonderful house present for the weekend host who has everything, especially if you throw in a chic set of spoon-straws, like the ones featured last week at Sally Schneider’s theimprovisedlife.com.

According to The Oxford Companion to American Food and Drink, the sweet soft drink we think of as root beer evolved from English and European low-alcohol “small beers,” carbonated by the fermentation of yeasts. One variation, given tonic properties by spruce or birch bark, was a popular preventative for scurvy, and when the colonists reached North America, they incorporated the similarly flavored sarsaparilla (Smilax ornata) and sassafras (Sassafras albidum) roots used by Cherokee, Choctaw, Iroquois, and other American Indian tribes.

An early mention of  so-called “root beer” was in Dr. Chase’s Recipes (1869); the recipe for the spring pick-me-up called for roots of burdock, yellow dock, sarsaparilla, dandelion, and spikenard, along with the oils of spruce and sassafras. The credit for the commercial beverage, however, goes to Philadelphia pharmacist Charles E. Hires, whose nonalcoholic fountain drink as well as a “household extract,” to be used for making root beer at home, were exhibited at the Centennial International Exposition of 1876**. Promoted as a temperance beverage and “hot weather requisite,” it contained “the highest grade of healthful herbs, barks, and berries.” Hires soon began selling bottled root beer and soda fountain syrup.

Today, Hires Root Beer, now owned by the Dr Pepper Snapple Group, is one of the hundreds of root beers available. At one of my neighborhood specialty markets, I counted eight of them—Boylan Bottleworks, Dad’s, Ithaca Soda Co., Maine Root, Natural Brew, Polar Classics, Sprecher, and Virgil’s. Not bad, considering the limited shelf space in Manhattan stores; all too often, the choices are far more limited.

With no standardized recipe, root beer may include ingredients such as vanilla, cinnamon, cloves, licorice root, birch oil, wintergreen, panama bark, yucca extract, hops, juniper berries, star anise, and/or sarsaparilla. You’ll search in vain, though, for sassafras. The FDA banned sassafras root bark in 1960 because of its high content of safrole; tests showed the compound was carcinogenic in rats***. It’s easy enough to dismiss this as a Nanny-State-in-Training regulation, but for centuries, the prevailing folk wisdom has been that sassafras roots dug at the wrong time of year are poisonous—and that’s enough for me.

One ingredient you will see in top-drawer root beers (including Weber’s) is cane sugar. Sugar in every form, of course, is currently Number 1 on the Food Police’s hit list, but many people find cane sugar cleaner on the palate than high-fructose corn syrup. No matter what, check out the ingredients list before falling for just any old-school packaging. Dad’s Old Fashioned Root Beer (“Since 1937”), for instance, has HFCS as its second ingredient, after water. The same is true of today’s Hires and other mass-market brands as well; if your supermarket is lacking in the root beer department, perhaps a summery splurge at realsoda.com is in order. You can also make it at home … or get in the car and ride on down to Weber’s.


*Weber’s Famous Root Beer in Pennsauken is open from around March 1 to the end of October. If you’re heading south on the New Jersey Turnpike, take Exit 4 and follow your car’s increasingly bossy GPS directions to 6019 Lexington Avenue (at Route 38). Weber’s is generally open until 9 or 10 p.m. on summer weekends, but hours do vary; call ahead (856.662.6632) so you won’t be disappointed.

** The Centennial Exposition also saw the introduction of the Remington typewriter, Alexander Graham Bell’s telephone, Heinz ketchup, and kudzu, which must have seemed like a good idea at the time.

*** Happily, the ban doesn’t extend to the powdered dried sassafras leaves known as filé, a seasoning and thickener in gumbos.

THE FIRST FAVA BEANS

The closest Manhattan comes to a village green is the farmers market at Union Square, and the chance to catch up with friends is part of the pleasure of shopping there. One of the Saturday morning regulars is Roy Finamore, a longtime cookbook editor, author, food stylist, and all-around good egg. This week, he delivered his “hey, girl” smooch as usual, but it was clear his attention was elsewhere. “What’s up?” I asked. “You okay?”

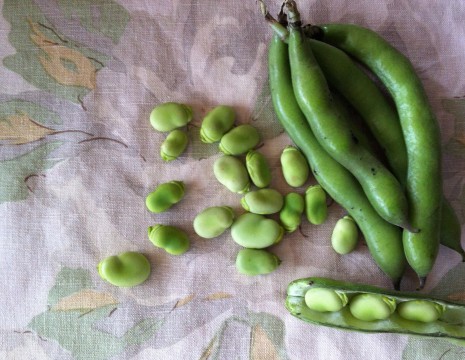
He gave me a soulful look. “Favas,” he said. He threw a glance at the market stall occupied by Lani’s Farm, a purveyor of pristine greens from south Jersey. There, on the table nearest us was a pile of the glossy swollen pods. They had undeniable star quality.

“I dunno,” I replied, conscious of a busy weekend and a jam-packed week ahead. “They can be so much work.” They need to be popped out of their pods, but there is another step as well: Unless the beans are very small, after cooking, they must also be divested of their second skin, which turns bitter as the favas mature. Well worth the effort, but still, an effort.

“Oh, these are so tender, you can eat them raw,” Roy countered. “All you need is olive oil and salt.” Simple words, but  enough to galvanize me: I started working my way through the scrum to that heap of beans, and when I looked up, Roy was gone.

The fava bean, Vicia faba, may look like a lima or other shell bean, but those belong to a different, New World genus of the legume family. The fava has an Old World pedigree; it’s been a staple of the European and Middle Eastern diet for thousands of years. Driven in large part by the demands of chefs, the fresh fava has become a seasonal draw at farmers markets here in the U.S., but it’s not exactly a newcomer. A quick dip into Will Weaver’s Heirloom Vegetable Gardening reveals that the bean was popular in kitchen gardens from Colonial times to the 1840s, when it gradually fell out of fashion.

I first had favas in England, where they’re known as broad beans, and it seems fitting to indulge this week in honor of the Diamond Jubilee. “The Old Broad Bean” is Cockney slang for Her Maj, and if a commemorative tea towel or mug isn’t your style, then I would think seriously about the dried broad-bean cufflinks or a necklace lacquered and painted with a likeness of the Queen from Swedish Blonde Design. Can scrimshaw be far behind?

One evening, we started off dinner with some of the fava beans raw, just as Roy suggested, with sea salt and our best olive oil. I didn’t stand on ceremony, but plunked a bowl of the beans in the pod on the table, so we could shell and eat our own. Making the prep a part of dinner gives you time to marvel at the soft white lining of the pods: Each bean looks like it’s nestled in cotton wool. Fresh goat cheese—mild and creamy, with just the right amount of tang—and a few slices of a garlicky sausage rounded out things nicely. All we had room for afterward was cold roast chicken and leftover broccoli rabe, heated until just warmed through.

Last night, after shelling the remaining favas, I realized I had a mixture of the small beans and larger ones, which would, I thought, benefit from cooking. I sorted them by size, then blanched the big ‘uns in a pot of boiling water for about two minutes. After draining, I slit their second, tight-fitting skins with a fingernail and peeled them easily enough. Then I combined the fresh and blanched beans in a bowl and dressed them with olive oil, Sherry vinegar, a squeeze of lemon juice, and some s & p.

Into the salad bowl went watercress and the tender, pale interior leaves from a head of escarole. A few mint leaves would have been very nice, too, but I didn’t have any. Instead I added a scattering of parsley and celery leaves, then the beans, and a little more oil and vinegar. Lo and behold, there was a remnant of Pecorino in the fridge, so shavings of that went on top of the salad, and I added a few curls of Parmigiano, for good measure. A damp, chilly evening in early June requires something hot and restorative, so the lamb stew destined for the freezer ended up on the stovetop instead. We ate that first, to warm our bones, then finished off with the salad.

I thought about emailing Roy to ask him what he did with his haul, but never mind. We’ll compare notes on Saturday morning.

SPRING’S GARLIC, ONIONS, & SHALLOTS

Every season has its stars. This time of year, people queue at farmers markets for ramps, one of the most pungent members of the vast Allium genus. I’m far more interested, however, in the heaps of fresh garlic, onions, and shallots I see, and on my last few visits to the Greenmarket, I slope off with an armload. The juiciness and sweet-sharp flavors of these more nuanced alliums ground everything I cook completely in the moment.

That’s because they are young bulbs that have just been pulled out of the soil, unlike the mature garlic, onions, and shallots we all rely on for much of the year. After harvest, those are cured—that is, allowed to dry so their stalks wither and the skins tighten around the bulbs. The thick, tight outer layer that results from curing protects the produce during winter storage.

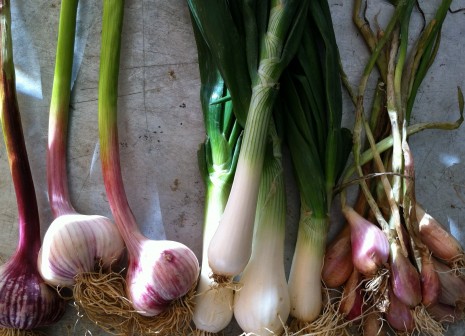
At its earliest stage, green, or spring, garlic can resemble a scallion or baby leek, and once you peel off its tough outer sheath, you can use it the white and pale-green parts in the same way. The green garlic you see at left in the photo above is more mature. Its leaves and stalk have become more fibrous, and it has also formed cloves; you’ll want to remove the thickened, moist skin around them before using. Its flavor is mild yet more rounded than its very early green counterpart, and the succulent bulbs lends themselves to—well, just about everything I cook these days, from salad dressings to sautéed spinach. I’m not alone: Martha Rose Shulman has made me crave a frittata, and David Tanis got me thinking about what gently warmed young garlic can do for potatoes and more. Yesterday, Memorial Day, I put a lavish amount of it in a chimichurri sauce for flank steak. Instead of overwhelming the cilantro and parsley, it somehow enriched the herbs instead. The end result was lush and verdant—the best I’ve ever made.

Green, or spring, onions (above, center) are young common onions, and the size of the bulbs depends on how long the plants remain in the ground. And what’s the diff between spring/green onions and scallions? A scallion, a long, slim type of onion, will never develop a bulb, no matter how mature it becomes.

Spring onions are quick cooking and thus a building block for many sautés. They’re lovely when sliced thin and cooked with asparagus or blanched fresh fava beans; spoon the resulting tenderness over pasta and shower with shavings of Pecorino Romano. They are also reason alone for a celebration. You could channel James Beard and prepare his herbed onion tea sandwiches for a drinks party. Or, if you are in the mood for a grander gesture, there is always a Catalan-style calçotada—or simply your backyard grill and plenty of romesco sauce.

Like garlic, the onion is among our most ancient crops, in all likelihood first cultivated in the mountains of Central Asia. The shallot (above, right) isn’t a separate allium species, but a variety of onion that freely multiplies, forming clusters of several lateral bulbs. Even when young, shallots have a more complex sweetness than common onions do; their flavor is subtle and intense all at the same time. If you tend to avoid shallots because they’re fiddly to peel, then now is the time to use them with abandon; the skin on the spring bulbs is relatively loose.

Lately, my vinaigrette of choice has been one with finely diced spring shallots, Champagne vinegar, a spritz of fresh lemon juice, and mild Alziari olive oil. Thinly sliced shallots, barely cooked with butter and a drizzle of balsamic vinegar, make a satisfying topping for a steak or burger. Quickly frizzled in olive oil and butter, they’re wonderful stirred into a warm potato salad made aromatic with thyme or tarragon.

Spring garlic, onions, and shallots are perishable, so refrigerate them like you would fresh green produce. Wrapped in a slightly damp kitchen towel and tucked in the vegetable crisper, my bulbs keep for at least a week. If you need to use them up (why? to make room for more, silly), cook them all together in one big glorious tangle and use them as a topping for a pizza. Some mozzarella and a veil of thinly sliced prosciutto di Parma will bring it home.

QUICK-BRAISED PEAS AND LETTUCE

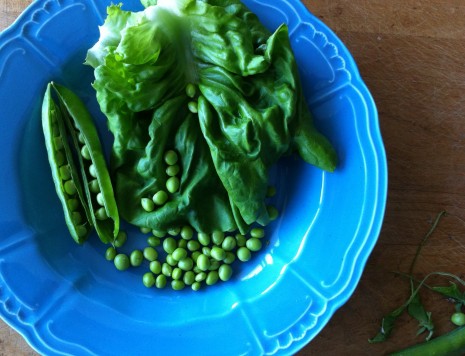
Something about garden peas makes me nostalgic for … I don’t know what. At their best, picked when small and young in the pod, they are what spring has always tasted like. I see gardeners, kneeling in the earth, working hard, being patient. Waiting for the world to wake up.

That’s why, last month, I started Easter dinner off with the puréed French pea soup called potage Saint-Germain. Garden peas flourish in cool moist weather, but in early April they’re still far from a reality in New York. Instead, I relied on Birds Eye’s finest: The flavor and tenderness of the frozen emerald-green BBs are a sure thing compared to supermarket peas in the pod, which are, more often than not, starchy and insipid.

Potage Saint-Germain isn’t all about the peas, though. Lettuce is what gives the soup its more complex, grassy, almost juicy sweetness, and the time-honored combination left me hungry for more.

My thoughts first turned to the classic dish known as petits pois à la française—baby peas gently simmered with lettuce and onion until they cruise past tender to become soft and voluptuous. It is sublime, but what I was after had to be simpler and more immediately gratifying.

When in doubt, I tend to quick-braise vegetables. The technique is nothing new, but it’s the key to many a scratch supper in our household. At the same time, you can easily cook some pasta, cut up a cold roast chicken, broil a piece of fish or some sausages, or fry an egg. So as far as I’m concerned, the recipe below is reason alone to keep a supply of frozen baby peas on hand. It’s also reason to splurge on the first sparkling-fresh garden peas in the pod at your local farmers market. Buy them in the cool of the morning and choose plump, bright-green pods. Pop open a pod—the peas should be small and tender enough to eat out of hand. Refrigerate them as soon as you get home and cook them that evening.

As far as the lettuce goes, I especially like butterhead varieties such as Bibb—when cooked, the leaves have great body—but I’ve also used romaine and green loose-leaved varieties with good results. Whatever you have in the vegetable crisper will be fine.

The beauty of this combination is its simplicity, but I have found myself embellishing it with the sort of oddments we all have knocking around in the fridge. Toss some diced pancetta into the pan along with the onion, for instance, or slice some leftover boiled potatoes and add them after you get the peas and lettuce working. Enliven the braise with a sprig of fresh thyme, mint, or parsley, or, at the end of cooking, swirl in fresh lemon zest or shredded basil. It’s really very hard to go wrong.

Quick-Braised Peas and Lettuce

Serves 4 to 6

Unsalted butter

A handful of thinly sliced spring onion or scallion

4 cups shelled fresh young garden peas (from about 4 pounds in the pod) or 2 (10-ounce) packages frozen baby peas, thawed

4 cups roughly chopped lettuce leaves

Coarse salt and freshly ground pepper

Sugar (optional)

1. Melt 4 tablespoons butter in a heavy-bottomed medium saucepan. Add the onion and cook over moderate heat until softened (don’t let it brown), about 5 minutes. Add ½ cup water and bring to a boil.

2. Add the peas, stirring to coat them with the liquid. Add the lettuce and stir or toss to combine. Cover the pan and return the liquid to a boil. Reduce the heat and simmer, still covered, about 5 minutes, or until the peas are tender and the lettuce is lush and succulent.

3. Season with salt, pepper, and, if so inclined, a pinch of sugar. Finish with a little more butter if you’re feeling reckless and eat while hot.

IN THE LARDER: PRALINE POWDER

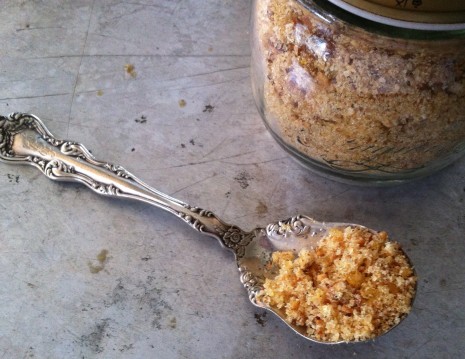
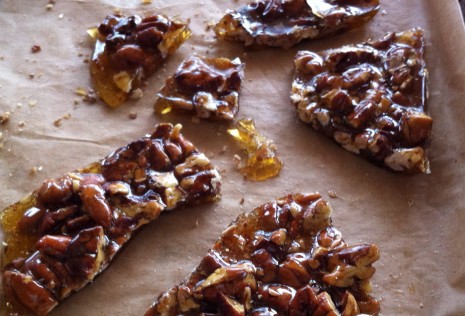
As much as I love the idea of New Orleans pralines (pronounced prah-leens), the creamy, fudgelike patties are far too sweet for me. I’ll take praline powder any day. The pulverized mixture of caramel and nuts is nothing new, but there’s a reason it should have a place in your “quick fix” file. It sends everything from a bowl of ice cream to Sunday morning pancakes or waffles into the stratosphere. It can swing savory as well: Give it a kick with a little cayenne, slather it on some thick-cut bacon (just you wait), and serve it for brunch or even a drinks party, à la Rick Ellis.

In restaurant kitchens, you’ll generally see praline powder made with almonds or hazelnuts. Personally, I’m partial to pecans: Their suave butteriness plays well with the faintly bitter edge of a deep golden caramel. And if making caramel—basically, sugar cooked until just shy of its burning point—intimidates you in the least, think of praline powder as a set of training wheels.

Although there are countless caramel recipes in the world, they can be divided into two types: wet and dry. A wet caramel consists of sugar and water heated together. A dry caramel is nothing more than melted sugar; there is no liquid added. The simple and virtually foolproof recipe below is a hybrid; I learned it from my husband, Sam, who snapped into cooking-school-instructor mode as soon as he saw what I was up to. “Pour just a little water in the pan before adding the sugar,” he said. “It’ll help the sugar cook more evenly.”

Even though this recipe is a cinch, a few caveats are in order:

• You are dealing with boiling syrup. It’s fiendishly hot, so Attention Must Be Paid.

• Avoid making a hard caramel on a humid day; otherwise, it will be sticky and impossible to grind.

• Although you need a heavy pot that conducts heat evenly, avoid one that’s too muscle-bound because you want it to cool down quickly. I use an (ancient) 1½-quart aluminum Revere Ware pot with a copper bottom.

• When cooking the caramel, be patient and let it develop a rich amber color. If it’s too blond, you won’t get the deep flavor you’re after. The finished praline will also tend to suck humidity out of the air and be sticky instead of hard as glass.

Praline powder works as an embellishment year round. Stir it into a crumbly topping for a fruit crisp, sprinkle it on sugar cookies or a plum tart toward the end of baking. Add luster to a weeknight compote of stewed fruit or dinner party–worthy crème brûlée. In moments of stress, a spoonful right out of the jar is remarkably soothing.

Oh! I almost forgot. About that bacon: Cook it on a rimmed sheet pan in a 400º F oven until it starts to turn golden. Meanwhile, stir together praline powder and a smidgen of cayenne pepper or ground cumin. Generously sprinkle the bacon with the praline mixture, then continue to cook until it’s just the way you like it.

Praline Powder

Makes about 2 cups

¼ cup water

1 cup sugar

1 cup pecans, lightly toasted, cooled completely, and roughly chopped

1. Put a piece of parchment paper on a rimmed baking sheet and lightly butter the paper. Pour the water into a small, heavy-bottomed pot. Add the sugar carefully, so that it doesn’t splash up the side of the pot (if that happens, simply wash down the side with a wet brush), and heat over moderate heat until the sugar dissolves. Do not stir. You want the syrup that results to boil and bubble evenly, so make sure the pot is centered on the burner and reduce the heat slightly if the syrup starts to spatter. Take a second to notice what that vigorous boil sounds like: the high-pitched snap-crackle-and-pop of Rice Krispies.

2. Keeping a close eye on the syrup, let it boil undisturbed until it turns a rich golden and smells like cotton candy, about 10 minutes. Listen—it will have quietened down as well.

3. Turn off the heat. Swirl the pan to even out the color (it should look like well-brewed tea) and add the nuts. Working quickly, stir the nuts to thoroughly coat them (a silicone “high heat” spatula is the best tool for the job), then immediately pour the mixture onto the baking sheet. Spread it into a thin layer as best you can, then let the praline cool completely.

3. Break the praline up into smallish shards. Working in a couple of batches, grind the praline into a relatively fine powder in a blender or food processor. Because I’m always surprised at how much praline powder I’ve made (it fluffs up when ground), I usually divide it between 2 small airtight containers. One sits in the cupboard until it’s all used up; the other goes into the freezer. You never know when it will come in handy.


HOME COOKING AND MORE

The James Beard Foundation’s 2012 cookbook of the year, Modernist Cuisine: The Art and Science of Cooking, by Nathan Mvhrvold with Chris Young and Maxime Bilet, comprises six volumes and 2,438 pages. Even though its list price of $625 signifies an investment (of book-shelf real estate as well as moolah), it seems reasonable when you consider the prodigious—and invaluable—research and expertise that went into the book’s creation. It changes what every serious cook knows—or thinks he or she knows—and does so in an imaginative, compelling way.

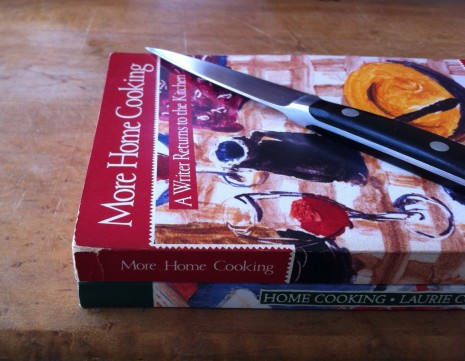
I sure hope it has legs. You know, like the two far more modest books above, Home Cooking (1988) and More Home Cooking (1993), written by Laurie Colwin and just ushered into the Beard Foundation’s Cookbook Hall of Fame.

The books are collections of the columns Laurie wrote for Gourmet from the mid-1980s through the early ’90s. I was fortunate enough to edit many of her monthly essays, which she would mail in, in batches of five or so. I cherished the fact that the person behind the intimate conversational tone and impeccable prose couldn’t spell worth a damn.* Fixing that gave me something to do besides tuck in an occasional comma.

Laurie wrote about the connection between farm and table long before that was on the culinary radar. She wrestled with the evolution of the family dinner in a period when working mothers were desperate for advice. She chronicled kitchen horrors and repulsive dinners, which are not the same thing at all. Like her novels and short-story collections, her food writing was honest, vigorous, and full of good cheer; what saved her work from sentimentality was the steely resolve at the core. She never let anyone off the hook.

Laurie was also among the writers I’ve known who taught me that sometimes the smartest thing an editor can do is not mess with something. Of course, her talent was very rare. A born natural, she had a brilliant, unerring sense of pace, character, tone, and style. She was incapable of burying the lede. And her recipes were almost an afterthought. To my mind, they were a breath of fresh air in a magazine overflowing with careful instruction.

I had first made Laurie’s acquaintance years beforehand, when I worked at the offices of Alfred A. Knopf, her publisher. I was new to New York City and Laurie was a starry young novelist who also happened to be extremely kind, wise, and good-hearted. At some point, she discovered I invited almost everyone I met over for supper. “How else will I make friends?” I explained. Laurie was entranced, and dug her datebook out of her bag. “When can I come?” she asked.

My entertaining was never fancy. I was barely making ends meet, so a company meal generally revolved around a big pot of soup, red beans and rice, a roast chicken, or some concoction of staples I’d brought back from my latest trip to Savannah—back then, ingredients like okra and collards were hard to find in the city.

I think I fed Laurie a gumbo. I recall being amazed at how exotic she thought it was, and happy about how good it tasted. We talked about beautiful old plates, the importance of table manners, and under-rated girl groups like the Velvelettes. A couple of days later, a slim package, wrapped in pretty striped paper, was waiting for me at work. “That was a most delicious evening,” Laurie had scrawled on the card. “And you deserve a good knife.”

Laurie died, very unexpectedly, of heart failure, in October 1992. She was 48. Her death left an enormous emptiness in the lives of everyone who knew her, either personally or through her books. I think of her almost every time I pick up one of her novels or short-story collections—they’re not only ageless but all still in print—and, of course, that knife, especially if I’m making one of her recipes. Soon it will be time for her tomato pie, with its Cheddary, crumbly crust, and juicy summer beets with pasta and ginger-spiked beet greens.

But all I have time for today are these staggeringly simple nibblies. Although they are known far and wide as Laurie Colwin’s rosemary walnuts, she would be sure to tell you it wasn’t her recipe, that she had simply bought a jar of them at a school fair, and after begging for the recipe, was directed to The Pink Adobe Cookbook, by Rosalea Murphy.

What’s also important is that even though the nuts are terrific with drinks, they also make a satisfying end to a meal in lieu of dessert. Eat them with oranges and coffee, as Laurie suggests, or pour one last glass of wine and put on some Motown. Laurie would be happy that the Velvelettes are still putting on a show.

Rosemary Walnuts

Makes 2 cups

1. Melt 2½ tablespoons unsalted butter with 2 teaspoons dried rosemary (crumbled), 1 teaspoon salt, and ½ teaspoon cayenne.

2. Pour this mixture over 2 cups walnut halves, tossing to coat them.

3. Bake the nuts on a cookie sheet at 350ºF. for 10 minutes.


* In the acknowledgments to More Home Cooking, my name is misspelled. Is that karma or what? Somewhere, Laurie is laughing.