Subscribe:

Enter your email address:

Delivered by FeedBurner

Previous Posts

Categories

Site search


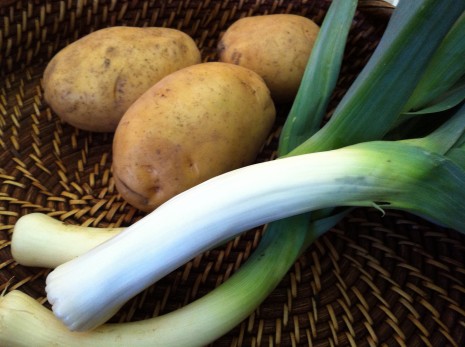
LEEK AND POTATO SOUP

Some soups require a lengthy list of ingredients and plenty of time on the back burner—they are worth preparing in a big batch so you can freeze a couple of quarts for another day. Leek and potato, however, does not need this sort of commitment. It’s an uncomplicated, almost austere, farmhouse soup that makes the most out of two vegetables, and it’s easily cobbled together on the fly.

I made it the other day after a trip to Union Square, pulling the leeks and spuds out of my tote bag and prepping them straightaway. Then as the soup simmered, I stowed the rest of my haul and set the kitchen to rights. Filling and fresh-tasting, the soup was exactly what we wanted on a windy cold April afternoon.

In terms of flavor, the leek is the most nuanced member of the onion-garlic clan. When shopping, look for fresh, relatively crisp leaves and stout white stems; the longer the stems, the greater your yield of chopped leeks will be. Left whole, with roots untrimmed, leeks will easily last a couple of weeks in the refrigerator if you wrap them in a slightly dampened kitchen towel, then put them in a plastic bag.

As for the potatoes, they have varying starch and moisture contents depending on their type. Russets, the standard baking potato, are high in starch and low in moisture; Yukon Golds are medium in both categories; and boiling potatoes are low in starch and, you got it, high in moisture. Each will make a delicious soup in its own way, but I find that if I use boiling potatoes, I need to add more salt; low starch means a higher proportion of natural sugars. No matter what kind of potatoes you use, avoid any that are tinged with green; they’ve been improperly exposed to light and have produced a mild toxin called solanine.

Since I prefer organic potatoes, I often leave on the skins unless very thick; it seems a shame to waste them, and they add to the rough-hewn character of the soup*. And although some leek and potato soup recipes say to simmer the vegetables in chicken stock and/or milk, I stick with water. It’s cleaner tasting, and if you like, you can thin as well as enrich the finished soup with some milk or cream.

Leek and potato soup hits the spot for lunch, but it can be an extremely satisfying scratch supper, too. I like to embellish it with a handful of greens—spinach or lemony-tart sorrel, for instance, or finely shredded kale—and serve it with a plate of brown bread, sweet butter, and smoked or kippered salmon. I first had this combination in Scotland, in a gray stone cottage framed by neat rows of blue-green leeks, and to this day the meal conjures long twilights, crackling peat fires, and a very nice bottle of malt. In case you find yourself wishing for dessert, a rhubarb oatmeal crumble is as good as it gets.

Leek and Potato Soup

Serves 4

About 4 large leeks

About 1½ pounds potatoes

3 tablespoons unsalted butter

Coarse salt and freshly ground pepper

Water, milk, or cream to thin soup if necessary

Chopped fresh thyme, chives, chervil, or tarragon for serving, if desired

1. Trim off the roots and dark-green part of the leeks. Discard the tough outer leaf layer. Cut leeks in half lengthwise and thinly slice. Swish them around well in a bowl of cold water, then let them sit so that any soil or sand settles to the bottom of the bowl**.

2. Scrub the potatoes and peel if desired. Quarter them lengthwise and cut into ½-inch pieces. Gently lift the leeks out of their bath with your hands and drain.

3. Melt the butter in a pot, add the leeks, and cook over low heat until the leeks are softened. Add the potatoes and about 6 cups water; season generously with salt. Bring to a boil, then reduce the heat and simmer, partially covered, until the potatoes are very soft, 30 to 40 minutes. Don’t get impatient; you want the potatoes almost, but not quite, falling apart.

4. Smash some of the potatoes against the side of the pot to give the soup a thicker, smoother consistency, or, if you’re feeling ambitious, pulse a few ladles of soup in a blender, then return to pot. Taste and think about adding some milk or cream. Or not. Tinker with the seasoning. Ladle into bowls and scatter with chopped herbs if desired.
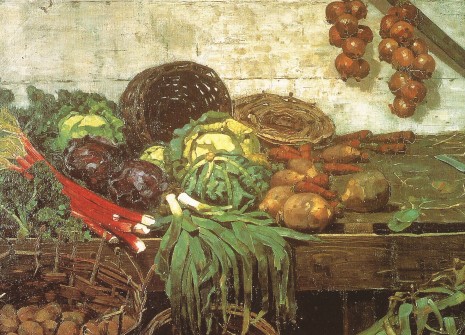
"The Vegetable Stall," by William York MacGregor (1884); photo courtesy National Gallery of Scotland, Edinburgh

*At the other end of the spectrum is crème vichyssoise, in which the leek and potato mixture is puréed with cream and served cold. This soup, which has great finesse and timeless appeal, was created by the French chef Louis Diat, who became chef de cuisine at the New York Ritz-Carlton in 1910. In 1947, he joined Gourmet as the in-house chef.

** Leeks always have a certain amount of soil embedded in their multitude of layers because of how they grow. Rain splashes the dirt onto the leaves, then washes it down to where the stem (which is actually lots of tightly bound leaves) begins. The particles of soil work their way deeper into the plants as they mature.

SCRATCH SUPPER: WILTED DANDELION SALAD WITH PINE NUTS AND PARM

Young, tender dandelions are as green as spring itself. And their flavor, clean and sharp like the air at dawn, is what I crave now. Although the greens are found around the world today, their use in the kitchen developed a very long time ago in the Mediterranean. You can trace the name “dandelion,” in fact, from the Latin down through the French dent-de-lion, or “lion’s tooth.” This is no great surprise given the jagged shape of the leaves, but personally I have a fondness for the common French name, pissenlit, which reflects their purported diuretic properties. I’m just waiting to see the word on a sign at the Union Square Greenmarket.

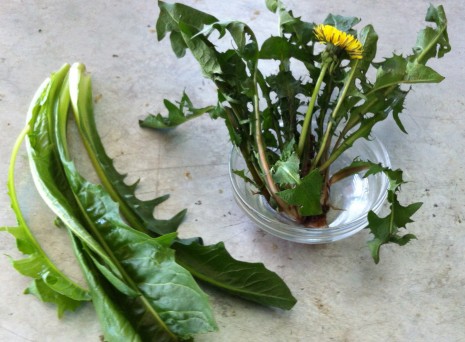
The best dandelion greens I’ve ever tasted were wild, taken from the long cool grass of an overgrown English orchard. The wild greens have intense flavor, but these days, I prefer them cultivated unless I know that the grass they’ve been plucked from is pesticide free. Whether wild or cultivated, however, there is a wide variation in the leaves among dandelion subspecies, and you’ll see two of them represented above.

Okay, pay attention to this bit: The sprightly, swirly rosette on the right is an example of what you don’t want to buy. The fact that it has flowered* means that the leaves have turned from bracing in a spring tonic sort of way to very harsh and unpalatable. So when shopping for dandelions, make sure any buds you see are tiny and few.

Although dandelion greens have a great affinity for a warm bacon dressing, last night I ransacked the refrigerator and freezer (twice) and came to the unsettling conclusion that we are sorely lacking in the pork department. I do not understand how this happened, but never mind: I found some pine nuts, and we made do. Garlic toasts and fried eggs rounded out things nicely.

This salad thrives on improvisation. I’ve called for Sherry vinegar below because I like its sweetness with the assertive greens, but red-wine vinegar or balsamic would be fine. Try pecans or homemade croutons if you don’t have pine nuts. I could also see adding some dried cranberries, if I had some.

By the way, Catalogna-type chicories (Cichorium intybus; often called dandelion chicories) can resemble true dandelions (Taraxacum officinale) and are often sold as such, especially at other times of the year. They are absolutely delicious and would work equally well here.

Wilted Dandelion Salad with Pine Nuts and Parm

Serves 6

6 handfuls of tender dandelions, washed, spun dry, and tough stems removed

3 tablespoons extra-virgin olive oil

3 tablespoons pine nuts

1 tablespoon Sherry vinegar, or to taste

Coarse salt

Shaved or very coarsely grated Parmigiano-Reggiano

1. Tear the greens into generous bite-sized pieces and mound them in a large heatproof bowl.

2. Heat the oil in a small skillet over moderate heat until it’s hot and toast the pine nuts, stirring them often, until golden. Fish the pine nuts out of the skillet with a spoon and scatter them over the salad. Immediately drizzle the salad with the hot oil and toss to coat. Drizzle with vinegar and season with salt. Add the Parm and toss once more. Serve right away.

* The next time you look at your lawn studded with a bumper crop of dandelion flowers and groan, remember that they are a fabulous source of pollen and nectar for almost a hundred insects, including bees. Dismay will turn to a virtuous glow in a split second.

BROCCOLI & CARROTS WITH GINGERED BUTTER

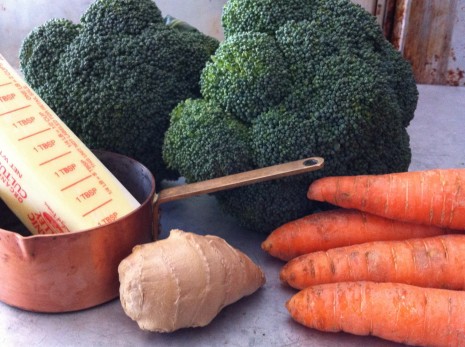
Lovely spring ingredients are just starting to appear at the markets in New York City, but you couldn’t really tell by a peek inside our vegetable crisper. Aside from fat bunches of kale and overwintered broccoli rabe—destined for meals later in the week—all I’ve got to work with at the moment are broccoli and carrots. Those vegetables may sound like Dullsville this time of year, but they are absolute lifesavers when you are too busy to think about what to cook and people are depending on you. I count on them to fill in the cracks of many a scratch supper.

The secret is gingered butter. I first encountered this stunningly simple sauce, spooned over a platter of asparagus, at a friend’s dinner party a good 20 years ago. For a long while, I made it all the time, but then it fell out of my culinary rotation.

For the life of me, I can’t imagine why. The beauty of good butter infused with lush, pungent ginger is that it embraces almost every vegetable you can conjure. It can unify the oddments we all have floating around in the refrigerator—half a cauliflower and a handful of green beans, for instance. Or it gives a single vegetable—roasted beets, say, or steamed bok choy—gloss and import.

Even though grating the ginger instead of finely chopping it may seem like a pain, that juicy, tender pulp is what makes the sauce. Use the freshest ginger you can find; it should be firm, unwrinkled, and heavy for its size. I happen to like gingered butter just as it is, simply seasoned with salt and pepper, but for variety, try swirling in grated garlic, toasted mustard seeds, fresh lemon zest, or a smidgen of cayenne. You can’t go wrong.

Broccoli and Carrots with Gingered Butter

Serves 4

This side goes with practically anything, from broiled fish flllets to pork chops, meatloaf, or a grilled steak. It’s also delicious served in a tumble over rice and eaten in front of the television.

A fat knob of fresh ginger (about 2½ inches long), peeled

4 tablespoons unsalted butter

Coarse salt and freshly ground pepper

1 bunch broccoli, cut into florets and, if desired, stems peeled and cut diagonally into thin coins

A few carrots, for color, peeled if desired and cut diagonally into thin coins

1. Grate the ginger on the medium holes of a box grater or a Microplane grater; you should have about 1 tablespoon of juicy, liquidy pulp. Melt the butter with the ginger in a skillet over low heat and set it aside to infuse. It should look sludgy and smell absolutely wonderful. Season with salt and pepper.

2. Cook the vegetables in a large pot of boiling salted water, uncovered, until just barely tender. This should take only a couple of minutes once the water comes back to a boil, but it all depends on how fresh your produce is and the size of the pieces, so be watchful. Drain the vegetables in a colander, run under cold water, and blot dry.

3. Reheat the gingered butter over moderate heat. Add the vegetables and cook, tossing them with the gingered butter to coat evenly, until they’re hottened up nicely, then serve at once.

DEVILED HAM—THE ULTIMATE PIGGYBACK SNACK

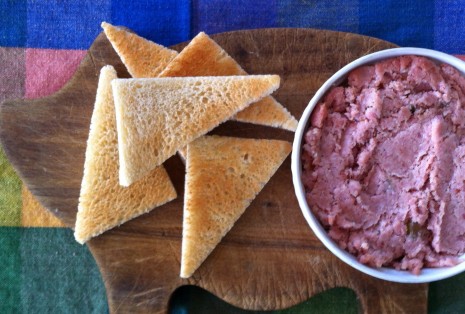
Deviled chicken, deviled eggs, and now … deviled ham. This is not a rut. It’s a trilogy, and my inspiration this week is the Easter ham still commanding pride of place in the refrigerator. From Lobel’s butcher shop (since 1840), it’s a stellar example of a city-cured*, or baked, ham. There is enough tender, juicy, rosy-pink meat left over for thick-cut sandwiches with chutney, and for larding a mac and cheese, scalloped potatoes, or gumbo later in the week. But what I am really, really looking forward to is deviled ham. With toast points.

In the United States, usage of the culinary term deviled to mean highly seasoned with spices or condiments dates from the early 19th century or well before, according to Janet Clarkson’s entertaining blog, The Old Foodie. The type of deviling that I’m most familiar with, however, isn’t especially fiery or peppery; instead, it gets a decided nip from Dijon mustard, usually with an assist from a little cayenne. Damon Lee Fowler, in his masterful Classical Southern Cooking, will back me up here.

Deviled ham rightly belongs to the far larger category of potted meats. Two centuries ago, I would have had to pound the cooked ham (or partridge, ox tongue, hare, etc.) to a smooth paste with butter in a large stone or marble mortar, then season it with salt, pepper, and perhaps mace and cayenne. Pressed into small crocks and sealed with clarified butter, my potted ham would have kept about two weeks in a cool, dry place.

I’m not much for historical re-enactments, so the food processor and refrigerator are more my speed, especially after a pep talk from culinary historian Rick Ellis. “Make canapés!” he said, and was off and running. “They were one of the first hors d’oeuvres served with drinks. I’ll bet there is a recipe in Fannie Farmer.” That’s Rick for you. His mind leaps to an icon in American culinary history, and mine leaps to—well, another icon, Jack Benny, who once famously defined an hors d’oeuvre as a ham sandwich cut into 40 pieces.

I could have spent the next hour entranced by YouTube clips of the Jack Benny Show. Rick, however, was paging gently though his 1918 edition of Fannie Farmer’s Boston Cooking-School Cook Book, which took pains with the description of the newfangled concept of canapés:

Canapés are made by cutting bread in slices one-fourth inch thick, and cutting the slices in strips … or in circular pieces. The bread is toasted, fried in deep fat, or buttered and browned in the oven, and covered with a seasoned mixture of eggs, cheese, fish, or meat, separately or in combination. Canapés are served hot or cold, and used in place of oysters at a dinner or luncheon. At a gentlemen’s dinner party they are served with a glass of Sherry before entering the dining room.

I’m sure they’ve always known that at the Augusta National Golf Club.

As for the deviled ham, Rick explained that the original [privately printed] 1931 edition of The Joy of Cooking has a recipe for Ham Sandwich Spread. “It was seasoned with mustard, salt, pepper, and vinegar,” Rick said. After a brief rummage in his library, he continued, “In the seventy-fifth anniversary edition, there’s a recipe specifically for Deviled Ham, made with ham and butter or mayonnaise. I’m sure it appeared earlier, though, I just don’t know which edition.”

Although Marion Cunningham’s reborn classic, The Fannie Farmer Cookbook (1979) has a recipe for Deviled Ham Spread, too, I would guess it’s an artifact from the 1950s: the first ingredient is two 4½-ounce cans of deviled ham. Don’t get me wrong. I grew up on Mr. Underwood’s deviled ham spread—along with Vienna sausages, it was standard fare at our house for riding out hurricanes—but I think somewhere along the line, the company changed the formula. It can’t possibly have been as salty or as scarily airy in texture as it is now. The oldest trademark in the United States** deserves a better product.

So instead I used Marion Cunningham’s plain Ham Spread as a starting point for the recipe below. It is simple and good, and will tide me over until I get around to making gumbo. Or deep-fried toast points.

Deviled Ham with Toast Points

Makes 2 cups

About 8 slices of best-quality white sandwich bread

2 cups (about ½ pound) chopped cooked city-cured (baked) ham

1 tablespoon minced onion

2 to 3 teaspoons Dijon mustard

A small pinch cayenne pepper

An even smaller pinch ground mace (optional)

1 tablespoon minced sweet pickle

2 tablespoons mayonnaise or well softened (but not oozy) unsalted butter

Salt and freshly ground pepper to taste

1. Heat oven to Broil and set rack about 6 inches from heat. Put the bread slices on a baking sheet and broil until pale golden and crisp on top, about 1 minute or so. Flip the slices and broil until pale golden on other side, about 1 minute. While bread is still hot, trim crusts and cut into triangles or strips. Once cool, the toast points will keep in an airtight container up to 1 day.

2. Purée the ham in a food processor. Scrape it into a bowl, then stir in the rest of the ingredients. Pack the deviled ham into a small crock and chill. Theoretically, this should keep at least a week or so, but good luck keeping it around that long.

* As opposed to a country, or dry-salt-cured ham, which is best enjoyed sliced paper-thin and tucked into biscuits. I’m a longtime fan of Allan Benton‘s country hams.

** Thank you, Rick, for cluing me in to the irresistible website papergreat.com.

Photo: Chris Otto/papergreat.com

WHAT’S SO GREAT ABOUT CAST IRON? TAKE PART AND FIND OUT

Photo: Joff Lee/Getty Images

My former colleague Nichol Nelson departed Gourmet some years ago, skipping town for a new life in Los Angeles. These days, you’ll find her going like gangbusters at TakePart.com, a remarkably energizing website devoted to helping you find a way to make this world a better place.

I’d forgotten how Nichol can sweet-talk anybody into anything. I let my guard down. And so even though I’ll still be blogging away right in this very spot, I’ll also be mouthing off on culinary matters every week at TakePart. They hired me as a food advice columnist, but you never know—I could surprise you and branch out. Remember those pithy letters from Ann Landers? I have a real fondness for that sort of thing. I mentioned all this to Molly O’Neill, and she said, “ANN LANDERS COOKS KALE! It sounds like an indie band!”

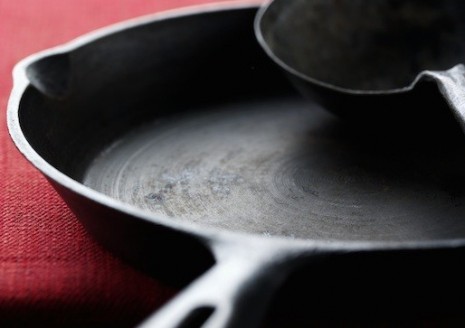
I want T-shirts. In the meantime, though, find my first TakePart column, on why I prefer cast-iron to nonstick, above the fold right here.

RICK ELLIS’S STUFFED EGGS FOR EASTER

I wrote about deviled chicken just a couple of weeks ago, but never mind: There is no better hors d’oeuvre for Easter or other springtime celebration than deviled, or stuffed, eggs. I am exceedingly fond of them, especially those made by our good friend Rick Ellis.

A food stylist and culinary historian who crafted the sumptuous meals in Martin Scorcese’s adaptation of Edith Wharton’s The Age of Innocence, Rick’s style of entertaining at home is simple, honest, and direct. And he is never afraid to serve his stuffed eggs to the fanciest guests because he knows they’ll be the first thing to disappear.

What gives Rick’s eggs their satisfying richness is butter. He got the idea as a teenager, when he saw Julia Child stuff eggs with an asparagus purée. “She put butter in with the yolks,” he said, and by the time the two of us met in the early 1980s, his version of green eggs and ham was party-perfect.

Julia Reed first wrote about Rick’s “fame-maker” eggs for the New York Times in 2002, although it took a deviled-egg recipe contest sponsored by the Southern Foodways Alliance two years later to get Rick to actually write up the recipe. I was thrilled when he took first prize (although a Nobel would not have out of place), and since then, recipes for deviled eggs made with butter have multiplied like Easter bunnies.

One of the things a friendship with someone like Rick will teach you is that simplicity doesn’t necessarily mean ease of preparation but rather perfection and balance in a dish. That’s why it’s important to cook and peel the eggs* with care and push the tender yolks through a fine-mesh sieve rather than mash them with a fork or whiz them in a food processor. The sieve is what gives the filling its great body—it’s fluffy and velvetized all at once.

Another trick Rick has up his sleeve has to do with the seasoning. If you make these eggs and then devour them immediately, they may taste overseasoned. “I always make the filling ahead and refrigerate it,” Rick explained. “Then I pipe it into the whites at the last minute.” He continued, “When something is chilled, the level of heat, the salt, the acidity, everything changes.” Rick also added a caveat about Dijon mustard; some brands are spicier than others, and, of course, freshness is a factor, too. That’s why he’s given a range for the mustard below.

Rick usually garnishes his stuffed eggs with snipped chives for freshness, but a dusting of smoked Spanish paprika is very nice, too. And I wouldn’t say no to a smidgen of minced crisp bacon ….

Rick Ellis’s Stuffed Eggs

Makes 24

1 dozen large eggs

¼ cup mayonnaise

2 to 4 tablespoons Dijon mustard

½ stick (4 tablespoons) unsalted butter, well-softened but not oozy

1 teaspoon fresh lemon juice

¼ cayenne pepper

Salt and ground white pepper

Finely snipped fresh chives for garnish

1. Place the eggs in a pan large enough to hold them in 1 layer and cover with cold water. Partially cover the pot and bring to a full rolling boil. Turn off the heat, cover completely, and let the eggs sit 15 minutes. Drain and run under cold water until the eggs are completely cold (quick cooling helps prevent a nasty green layer from forming on the yolks).

2. Peel the eggs (under cold water if they prove difficult) and cut in half lengthwise. Remove the yolks and with a flexible silicone bowl scraper or spatula (or your fingers), rub the yolks through a fine-mesh sieve into a bowl. Add the mayo, 2 tablespoons mustard (or to taste), and butter and mix until smooth. Stir in the lemon juice, cayenne, and a generous amount of salt and white pepper. Refrigerate the filling and the whites separately up to 1 day.

3. Let the filling warm up at room temperature just enough to spoon or pipe into the egg white halves. (If piping, use a pastry bag fitted with a ½-inch tip or jury-rig one out of a plastic ziptop bag with a corner snipped off). Neatly spoon or pipe the filling into the egg white halves and sprinkle with chives.

* The eggs shouldn’t be cooked at a vigorous boil; otherwise the yolks will be tough. Ease of peeling is related to pH—that is, acid/alkaline levels. Eggs that are a good week old (a given if you buy them at a supermarket) will be more alkaline, thus have a higher pH and, yep, be a cinch to peel. This is why adding vinegar to the water—one of the great enduring culinary myths—isn’t a good idea. And if you are good about planning ahead, do as cooking authority Shirley Corriher does and turn the (securely closed) egg carton on its side the night before hard-cooking the eggs; that way, the yolks will be well and truly centered in the whites.

TURNIPS IN VERY EARLY SPRING: A MARKET STORY

It took me a long time to come around to the idea of turnips. Although the root vegetable has always been part of the southern culinary repertoire, I’ve often found it tough and woody, preferring instead its spicy greens, added to whatever other pot greens I had on hand. Eventually, I acquired a taste for the tender, sweet Japanese turnips that have become increasingly available during the summer. That said, I’m mortified when I think of the times I’ve bought them with the best of intentions, only to let them rot in a lonely corner of the fridge.

But it is a restless time of year and I’ve been pining for something different. Something to make me sit up and pay attention. In spite of a mild winter followed by an unseasonable stretch of warm weather, this past Saturday’s jaunt to the Union Square Greenmarket was, as my pal Susan would say, still more about foraging for overwintered produce than actual shopping. “A hard frost is coming,” was the common refrain among the upstate farmers. They gazed incredulously at passers-by in flip-flops and shorts. You should never let your guard down in March.

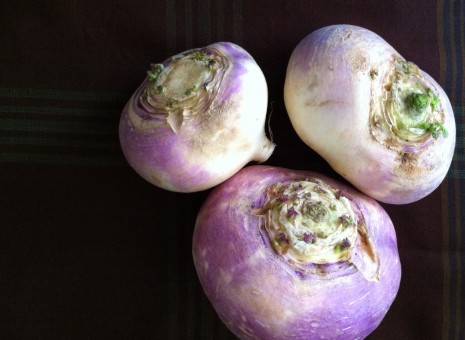
I drifted to a halt in front of a basket of turnips. Burly and broad-shouldered underneath their rich violet overcoats, they looked a little battle-scarred. I picked one up. Heavy for its size and surprisingly smooth-skinned, it fit my hand like a baseball. Or dinner. I toted a bagful home.

Turnips are rustic and homely, an aromatic underpinning of many a soup and stew. They can also be creamed, like onions. That technique only makes sense to me if the vegetable is grown in very hot weather; then it develops a strong mustard flavor in need of camouflage. Otherwise, cream dulls the sharpness, the bite that’s at the heart of the vegetable. Butter, however, is a different story. It both heightens and rounds out pepperiness—think of what it does to a radish.

Sick to death of roasted vegetables, I ended up with a simple, fresh-tasting turnip purée. Enriched with butter and shards of smoky bacon, the flavor still came across as edgy and very direct—a spring tonic, of sorts. Exactly what I needed.

Turnip Purée with Bacon and Shallots

Serves 4

I served this with deep-flavored skirt steak, but another time, it would be wonderful with duck breast or short ribs. Maybe I’ll push it in an Indian direction by setting the bacon aside for a sprinkling of ground toasted cumin and coriander seeds, peppercorns, and cardamom. Doesn’t that sound as if it would be nice with lamb? One last thing: I added some finely chopped shallots for color, but scallions or any other green onion would be good, too.

3 pounds turnips, scrubbed, trimmed, and any greens cut off and saved to cook separately

About 3 tablespoons butter, cut into pieces

Coarse salt and freshly ground pepper

3 to 4 slices of bacon, cooked until crisp, then crumbled

A scattering of finely chopped shallots

1. Unless turnips are very young and thin-skinned, they should be peeled. If they’re on the large side, take off about 1/8 inch of the flesh along with the skin; it can be tough even when cooked. Cut the turnips into 1½-inch pieces. I know this sounds picky, but when the pieces are all the same size, they’ll cook uniformly.

2. Meanwhile, bring a large pot of salted water to a boil. When it’s ready, cook the turnips until they’re beyond tender (they should be soft but not falling apart), 15 to 20 minutes. Don’t rush this step; undercooked vegetables never mash or purée properly.

3. Tip the turnips into a colander to drain, then tip them back into the pot. Let them steam over moderately low heat for a few minutes, shaking the pot, to evaporate excess moisture. Purée the turnips in a food processor* until silky smooth.

4. Scrape the purée back into the pot. The other night, I let mine sit there for a bit while I tended to the rest of dinner, and there was still some excess moisture that began to separate out. If that happens, cook the purée over moderately high heat, stirring, until the watery part evaporates. Then stir in the butter, a piece at a time, and cook, stirring often, until the purée tightens up and develops a consistency rather like that of lightly whipped cream. Season with salt and pepper, scatter with bacon and shallots, and serve right away.

* Because turnips don’t have a high starch content, a food processor won’t reduce them, like it will potatoes, to library paste. You could also use a ricer or food mill. I’m not sure you’ll get the same satiny effect with a handheld masher, but the end result will still be delicious.

DEVIL ME A CHICKEN

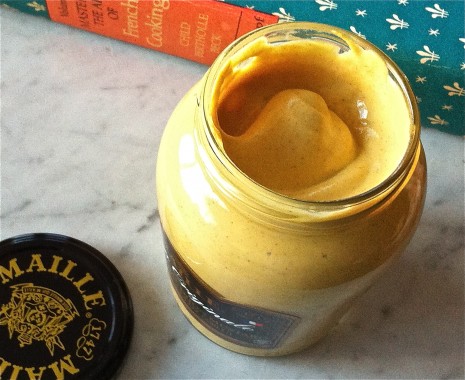
Nothing delivers brightness and body faster than Dijon mustard. I learned this at a young age, when a family friend brought my mother a big ceramic jar of the condiment from France. It was so noble looking, it probably would have remained untouched on a pantry shelf for years if it hadn’t been for the publication of Julia Child’s Mastering the Art of French Cooking, in 1961.

My mother read that book like a novel. But it just occurred to me this instant that she used it as a guidebook as well. One of her first forays abroad was Poulets Grillés à la Diable—chicken broiled with mustard, herbs, and bread crumbs. My father helped her coax two suspicious, balky children to the table with a uncharacteristically folksy twang that would have done Andy Griffith proud. “You mean, you deviled me a chicken?” he asked in mock amazement. My mother cracked up, we all did, and, almost without noticing, my brother and I cleaned our plates. “Devil me a chicken,” soon became a family catch phrase, employed any time one of us discovered something new and delicious.

The secret, of course, was the Dijon mustard. Although much livelier than the powdered English mustard commonplace in deviled eggs and deviled crab, it still held true to what we were familiar with: To a southerner, something that’s deviled doesn’t mean it registers on the Scoville scale, but that it’s piquant—nuanced yet provocative enough to keep you coming back for more.

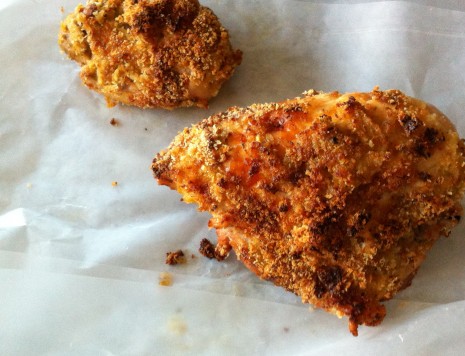
Swaddling chicken pieces in a creamy, full-bodied mustard coating infuses the following mantle of bread crumbs with flavor and helps protect the meat during high-heat cooking. That moist underlayer makes any sort of sauce superfluous. Swap a blend of fresh rosemary, thyme, and mint for the tarragon and use the same formula for leg of lamb, and you have yourself Easter dinner.

Spoonfuls from my mother’s regal-looking jar of mustard soon found their way into everything from the weekly meatloaf to salad dressing and that ultimate dinner-party dish, chicken Divan. The brilliant thing about deviled chicken, though, is that it is good hot, cold, or room temperature—an asset for every season, but especially this year, when the early spring weather has been so confounding.

Chicken Broiled with Mustard, Herbs, and Bread Crumbs

Adapted from Mastering the Art of French Cooking, by Julia Child, Louisette Bertholle, and Simone Beck

Serves 4

Julia Child partially broils the chicken before smearing it with mustard and herbs, but my success with that technique depends on the oven. Below, I roast the chicken at high heat during that preliminary stage, then finish it off under the broiler. And I may as well admit to the fact that sometimes I start the chicken on the wrong side, forget to turn it over, or, when I do, leave part of the crust on the bottom of the pan. It doesn’t seem to matter. Patch the crust if need be, or loosely cover the chicken with foil if the crust starts to overbrown. One last thing: You need cayenne for its signature sharpness—an altogether different heat than the mustard—but cutting it with Spanish smoked paprika is wonderful, too.

A 3½-pound chicken, cut into serving pieces, or your favorite skin-on, bone-in chicken parts

Coarse salt and freshly ground pepper

6 tablespoons Dijon mustard

3 tablespoons finely chopped shallots or green onions

½ teaspoon finely chopped fresh tarragon or thyme

A generous pinch of cayenne pepper

A good 3 cups of fresh white bread crumbs (whizzed up in a blender or food processor)

1. Preheat oven to 500º F. Put the chicken, skin-side down, in a shallow broiler-proof pan or rimmed baking sheet and roast 10 minutes. Turn the chicken over and roast 10 minutes more, basting with a little fat in the pan if you think it necessary. The chicken should be very lightly browned. Remove it from the oven and salt it with a light hand.

2. While the chicken is roasting, blend the mustard with the shallots, herbs, and seasonings in a bowl and spread the bread crumbs on a plate. Once the chicken is out of the oven, spoon some of the basting fat, a few drops at a time, into the mustard and whisk to make a mayonnaiselike cream. Spoon off the rest of the basting fat and reserve for later. Paint the chicken with the mustard mixture and roll it in the crumbs, patting them on so they adhere. Return the chicken to the pan, skin side down.

3. Set the oven to Broil and dribble a little of the reserved basting fat over the chicken. Brown 10 minutes under a moderately hot broiler. Turn the chicken over, dribble with a little more fat, and brown on the other side until done, about 10 minutes more. (Loosely cover the chicken with foil if it starts to get too dark.) At this point, don’t be surprised if someone walks into the kitchen, breathes deeply, and exclaims, “What smells so delicious?”

ROASTED SEA SCALLOPS A LA LESLIE REVSIN

I am not an ambitious seafood cook. I would rather keep it simple and fast, which is why I don’t often turn to actual recipes for inspiration. Last week, though, when I was pruning a bookshelf—a donation to the Housing Works Bookstore was in the offing—I came across Leslie Revsin’s Great Fish, Quick: Delicious Dinners from Fillets and Shellfish, and felt as if I’d found a long-lost friend. The book, published in 1997, is dated as far as some sustainability issues go, but it doesn’t matter. If necessary, you can easily adapt the recipes to whatever seafood you choose to buy*.

At my local fish market, I fell hard for the sea scallops. I love their rich, resonant sweetness, and when I saw some real beauts, I just had to have them. Marketed as local and “dry”—that is, not soaked in sodium tripolyphosphate (STP) to retain moisture—there was no reason to disbelieve the claim.

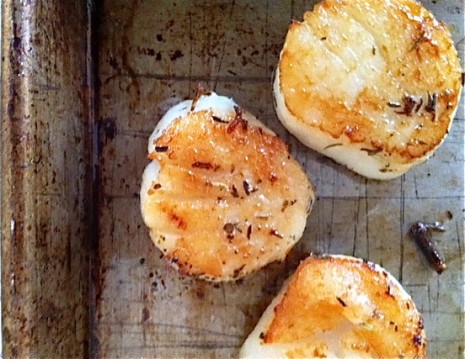
Unlike treated scallops, which are flabby and too shiny, these were firm and creamy white, with a natural come-hither bloom that was impossible to resist. They were moist yet a little sticky to the touch, so I knew they would brown beautifully. Scallops treated with STP are slippery; they can absorb as much as 25 percent in water weight (which you, the consumer, pay for) and when cooked, they “weep” and end up shriveled, not sautéed, with a soapy aftertaste.

What caught my eye in the recipe below were the herbes de Provence. A friend gave me a jar of her homemade blend—a heady combination of dried thyme, rosemary, winter savory, bay leaf, marjoram, sage, and lavender—for Christmas, and it was high time to branch out from roast chicken and lamb.

I first met Leslie in the early 1980s, when she was cooking at the Bridge Café, near the foot of the Brooklyn Bridge. A culinary star, she’d made headlines when she became the first female chef at the Waldorf-Astoria; as poissonière, she was in charge of all fish. The barricades were still up at the top French restaurants in the city, however, and after a bravura four-year run on her own at Restaurant Leslie, she cooked her heart out in restaurants such as One Fifth and Bridge Café—lucky for people like me, I suppose, who couldn’t afford anything more rarefied. After a stint as executive chef at the Inn at Pound Ridge, in Westchester, she became a consultant, a teacher, and a wonderful writer before dying of cancer in 2004, at age 59.

In Great Fish, Quick, Leslie’s voice is as fresh as it ever was, and you can’t help but get swept up in her enthusiasm. She found the fact that scallops can swim by clapping their shells together absolutely enchanting. “Scallops are the castanets of the sea!” she exclaims. It’s a fanciful image, but one that is absolutely spot-on (for a short video, click here). “The first time I startled a flock of those things,” a diver once said, feelingly, to me, “I almost had a heart attack.”

Scallops open and shut their shells by using their drum-shaped adductor muscle, which is what we eat. It’s astonishing that such a hard-working muscle is so yielding and tender. Cook scallops ever-so-slightly underdone, advises Leslie. “They’ll be like satin on your tongue.”

“She was ahead of the curve by baking scallops quickly,” Arno Schmidt told me. The former executive chef at the Waldorf who broke protocol by hiring a woman has just finished a book about his experiences cooking in grand hotels. “Up to her time, they were cooked until leathery.” He took issue, however, with her method of using a rimmed baking sheet. “Most household cookie sheets are very flimsy, and some don’t have a solid rim all around,” he cautioned. “And Leslie created her recipe before there were smoke detectors!”

I lucked out in the smoke department, and used a old heavy-duty quarter sheet pan, which handled its load just fine. But I also experimented with what chef Schmidt suggested—a large cast-iron skillet—and that worked beautifully, too. “Heat it on top of the stove, oil it lightly, and when smoking hot, add the scallops,” he said. “Then finish cooking in a very hot oven.”

Although two pounds of top-quality sea scallops are far from cheap, once you remove the tough little ligament glommed on to the side of each one, there is virtually no waste**. Because they cook so quickly, they make a wonderful meal if you find yourself having to entertain during the week. Served with potatoes, brussels sprouts, and a slice or two of crisp bacon, they are festive and homey, all at the same time.

Roasted Sea Scallops with Provenςal Herbs and Lemon Peel

Adapted from Great Fish, Quick: Delicious Dinners from Fillets and Shellfish by Leslie Revsin (published by Doubleday, 1997)

Serves 4

If you prefer, sear the scallops in a large cast-iron skillet. Finish them by popping the skillet into a preheated 450ºF oven until they’re cooked medium (about 3 to 5 minutes, depending on size), or to your taste. After removing the cooked scallops, add the wine to the skillet and concentrate the juices over a burner as described in the recipe.

2 pounds sea scallops, at least ¾ to 1 inch in height

1½ tablespoons extra-virgin olive oil

1 tablespoon dry Sherry

a generous ¼ teaspoon dried lemon peel

1¼ teaspoons herbes de Provence

coarse salt and freshly ground pepper

3 tablespoons dry white wine or dry vermouth

1. Preheat oven to 500ºF. Put a heavy-duty baking sheet rimmed on all four sides on the rack with a long side facing you. Take a look at your scallops; peel off and discard the tough ligament on the side. Rinse the scallops, pat dry, and put them in a bowl.

2. Add the olive oil, Sherry, and lemon peel. Crumble the herbs over all and season with salt and pepper. Toss gently with your (clean) hands or a rubber spatula. Let the scallops marinate 10 minutes or so.

3. Pick up the bowl of scallops, open the oven door, and pull the baking sheet to the front. Working quickly, so you don’t let too much oven heat escape, turn out the scallops and marinade onto the sheet. The scallops won’t fall into perfect position of course, but don’t try to move them unless they’ve all fallen into a pile. Push the baking sheet to the back of the oven and close the door.

4. For medium scallops, roast until lightly brown on the bottom and springy-firm when gently squeezed on their sides, 6 to 8 minutes. (They will be slightly translucent in the center when cut with a knife.) For well done, roast a few minutes longer. If the bottoms of the scallops aren’t golden brown by the time they’re cooked to your taste, they will be delicious nonetheless. No matter what, if they don’t easily release from the baking sheet, don’t try to force things, but give them another few seconds.

5. Transfer the scallops, browned side up, to a plate and loosely tent with foil. With a wooden spatula or spoon, scrape up the browned bits stuck to the baking sheet. Add the vermouth or wine and place the pan on the stovetop over low to medium heat. Tip the pan slightly and keep that corner over the heat to better to control things. Let the liquid boil for about 1 minute to thicken and concentrate its flavor. You won’t end up with more than a few drops for each scallop, but those few drops definitely heighten their flavor.

6. Place the scallops on warm dinner plates, drizzle them with the wine juices, and serve right away.


* The Monterey Bay Aquarium Seafood Watch makes life a little easier—or more convenient, at any rate—with their handy smart-phone app.

** In Japan, even these odd bits are used. The masterful Elizabeth Andoh took a quick break from chronicling recipes and stories from Tohoku in the forthcoming Kibo to explain that scallop ligament, called himo, is dried into chewy squiggles, like squid jerky. It’s eaten as a snack with sake or beer. Me? I’ll stick with edamame and crisp-fried chicken skin.

BEAUTY, TRUTH, ART … AND GETTING KIDS TO EAT THEIR VEGETABLES

Most innovative concepts are really very simple, and this one is no exception: Exploring the intrinsic beauty found in fresh fruits and vegetables encourages children to make smart food choices that also happen to be delicious.

That’s what the community of professional artists known as Studio in a School thinks, at any rate. For 35 years, the organization has fanned out into schools to lead classes in drawing, printmaking, painting, and sculpting, and to work with teachers in connecting art with academic subjects. Nutrition seemed like a natural outgrowth, and in 2010 Studio collaborated in part with Teachers College, Columbia University, to create the first seven-week “Art & Healthy Living” program for fourth graders.  So far, 75 under-served schools in all five boroughs have participated, and each program ends with an art exhibition.

You’ll find more than 50 works currently on view until March 14 at the Studio in a School gallery, at 1 East 53rd Street; hours are Monday through Friday, 8 a.m. to 8 p.m., and Saturday, 8 a.m. to 6 p.m.

Last week’s opening reception was distinguished not only by the blaze of talent and ability evident on the walls but by the artists’ modesty and maturity, characteristics all too rarely seen at this sort of event. When complimented on his drawing of a carrot, Jordan Collet (above), from P.S. 297, in Brooklyn, said, “Why, thank you so much,” then graciously turned to include his sister and grandmother in the conversation.

Jordan is the student of Elaine Greenstein, author-illustrator of numerous books for pre-schoolers and young readers, and a longtime friend. I was struck by the balance of boldness and delicacy in Jordan’s drawing. “He always seems to have a definite direction in mind when he begins,” Elaine said. “And he enjoys trying a new medium.”

All her students used a reed pen. “You must focus hard to control the pen and ink, and look very hard at the object you are drawing from observation,” she explained. “Because we used India ink, which makes a permanent stain if spilled, everyone also had to concentrate on being careful. I think the combination helped the students make extraordinary work.”

I imagine they were also inspired by Elaine’s passion for food. The daughter of a third-generation professional baker, Elaine has worked as a pastry chef and is one of those enviable people who will stage an elaborate dinner party at the drop of a hat. Her books often revolve around culinary pleasures, whether the invention of one of the world’s greatest sweet treats in Ice Cream Cones For Sale! or the enormous prize-winning vegetables in Mrs. Rose’s Garden.

Elaine’s protégés would view Mrs. Rose’s radishes, the size of dinner plates, with knowledgeable eyes. They’ve learned that radishes, like carrots, are taproots. “Roots store energy,” one girl said to her beaming mother. “That’s what you get when you eat ’em.” Another child tugged a younger sibling toward an oil pastel. “Did you know carrots come in different colors?” she asked. “They all crunch the same, though,” she added reassuringly. “They’re good.”

New ideas taking root. Photo courtesy of Studio in a School